Installing Crown Moulding In Our Master Bedroom
This is a sponsored post written by me in partnership with Home Depot Canada. All opinions and experiences are 100% my own.
If you would have asked me two months ago to put together a list of the top 3 home DIY projects that scare me, crown moulding would be in the top 3… along with replacing a toilet and mold removal. Don’t get me wrong, I LOVE crown moulding – nothing finishes off a room like beautiful trim work – but the idea of installing it… nope, you lost me!
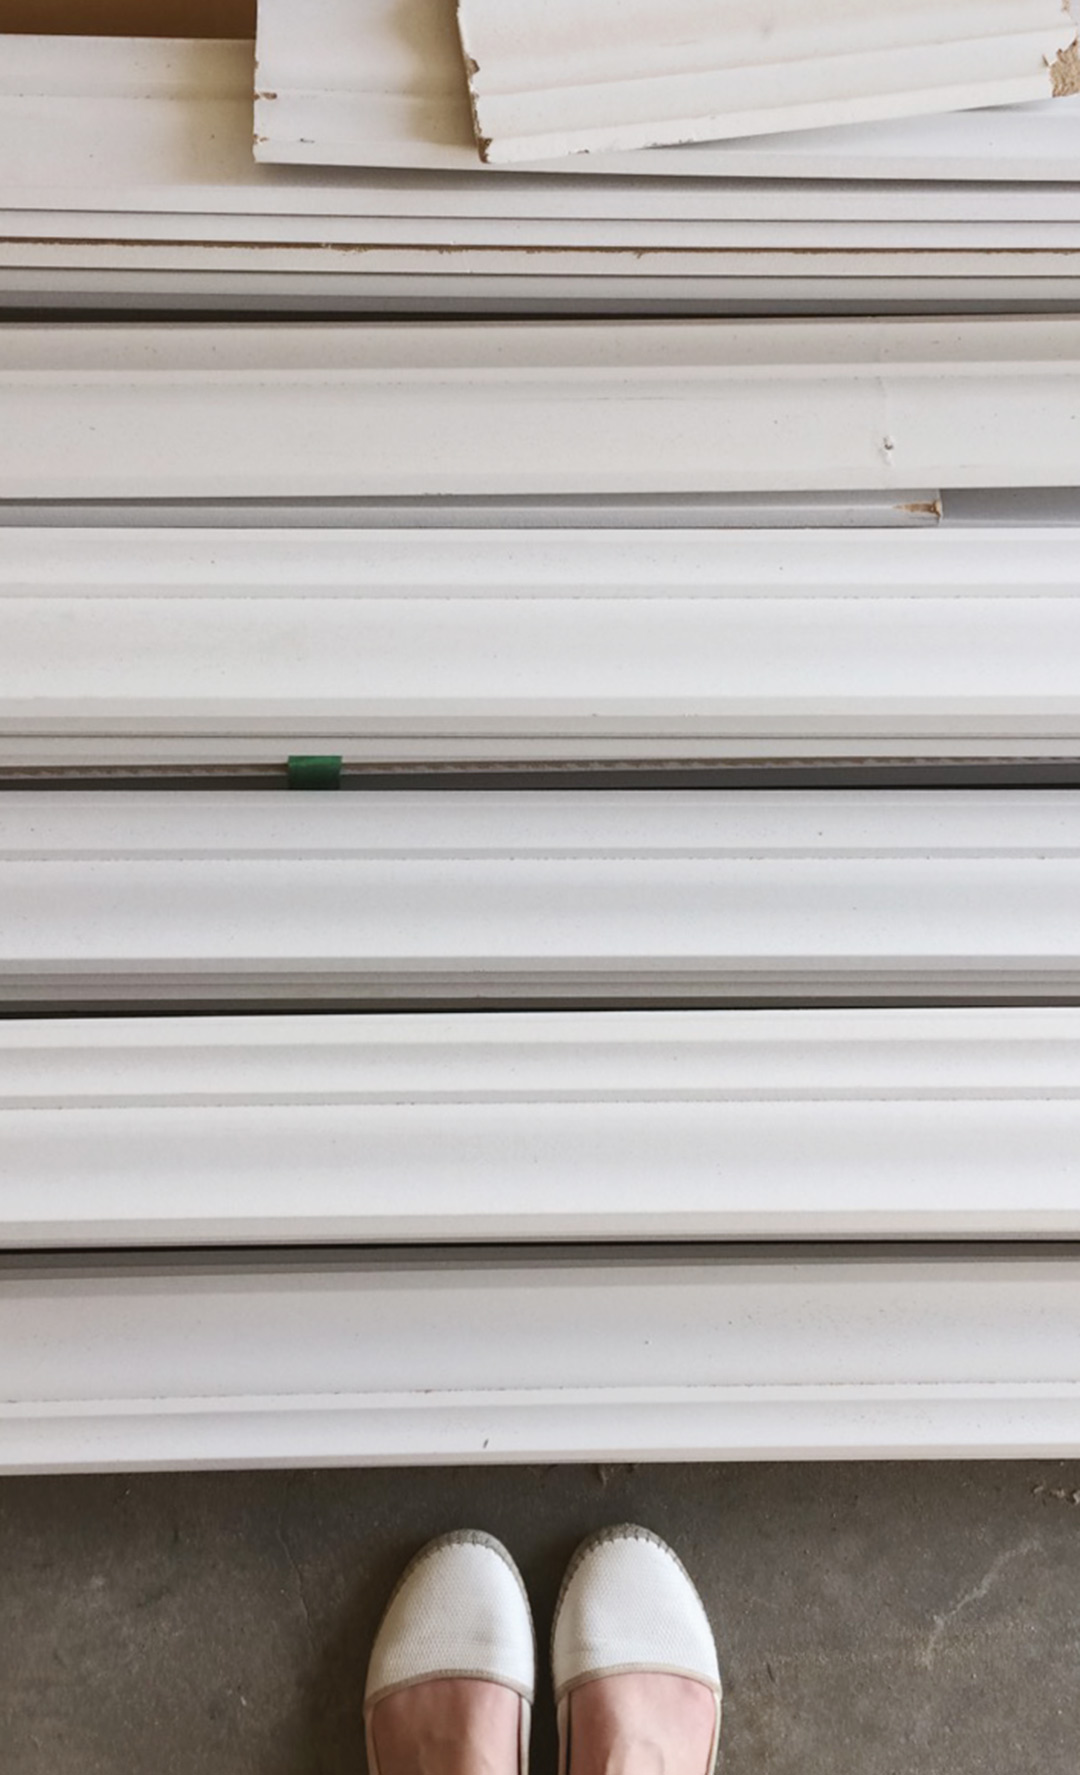
There’s something about my lack of ability to visualize the process that made it seem like a daunting task. So many angles! So many precise cuts! Ahhh! I couldn’t handle the pressure! But when a big ol’ stack of beautiful Alexandria Crown Moulding from Home Depot Canada showed up in my driveway, I knew it was time to put my big girl pants on, throw on my thinking cap, and get to work!
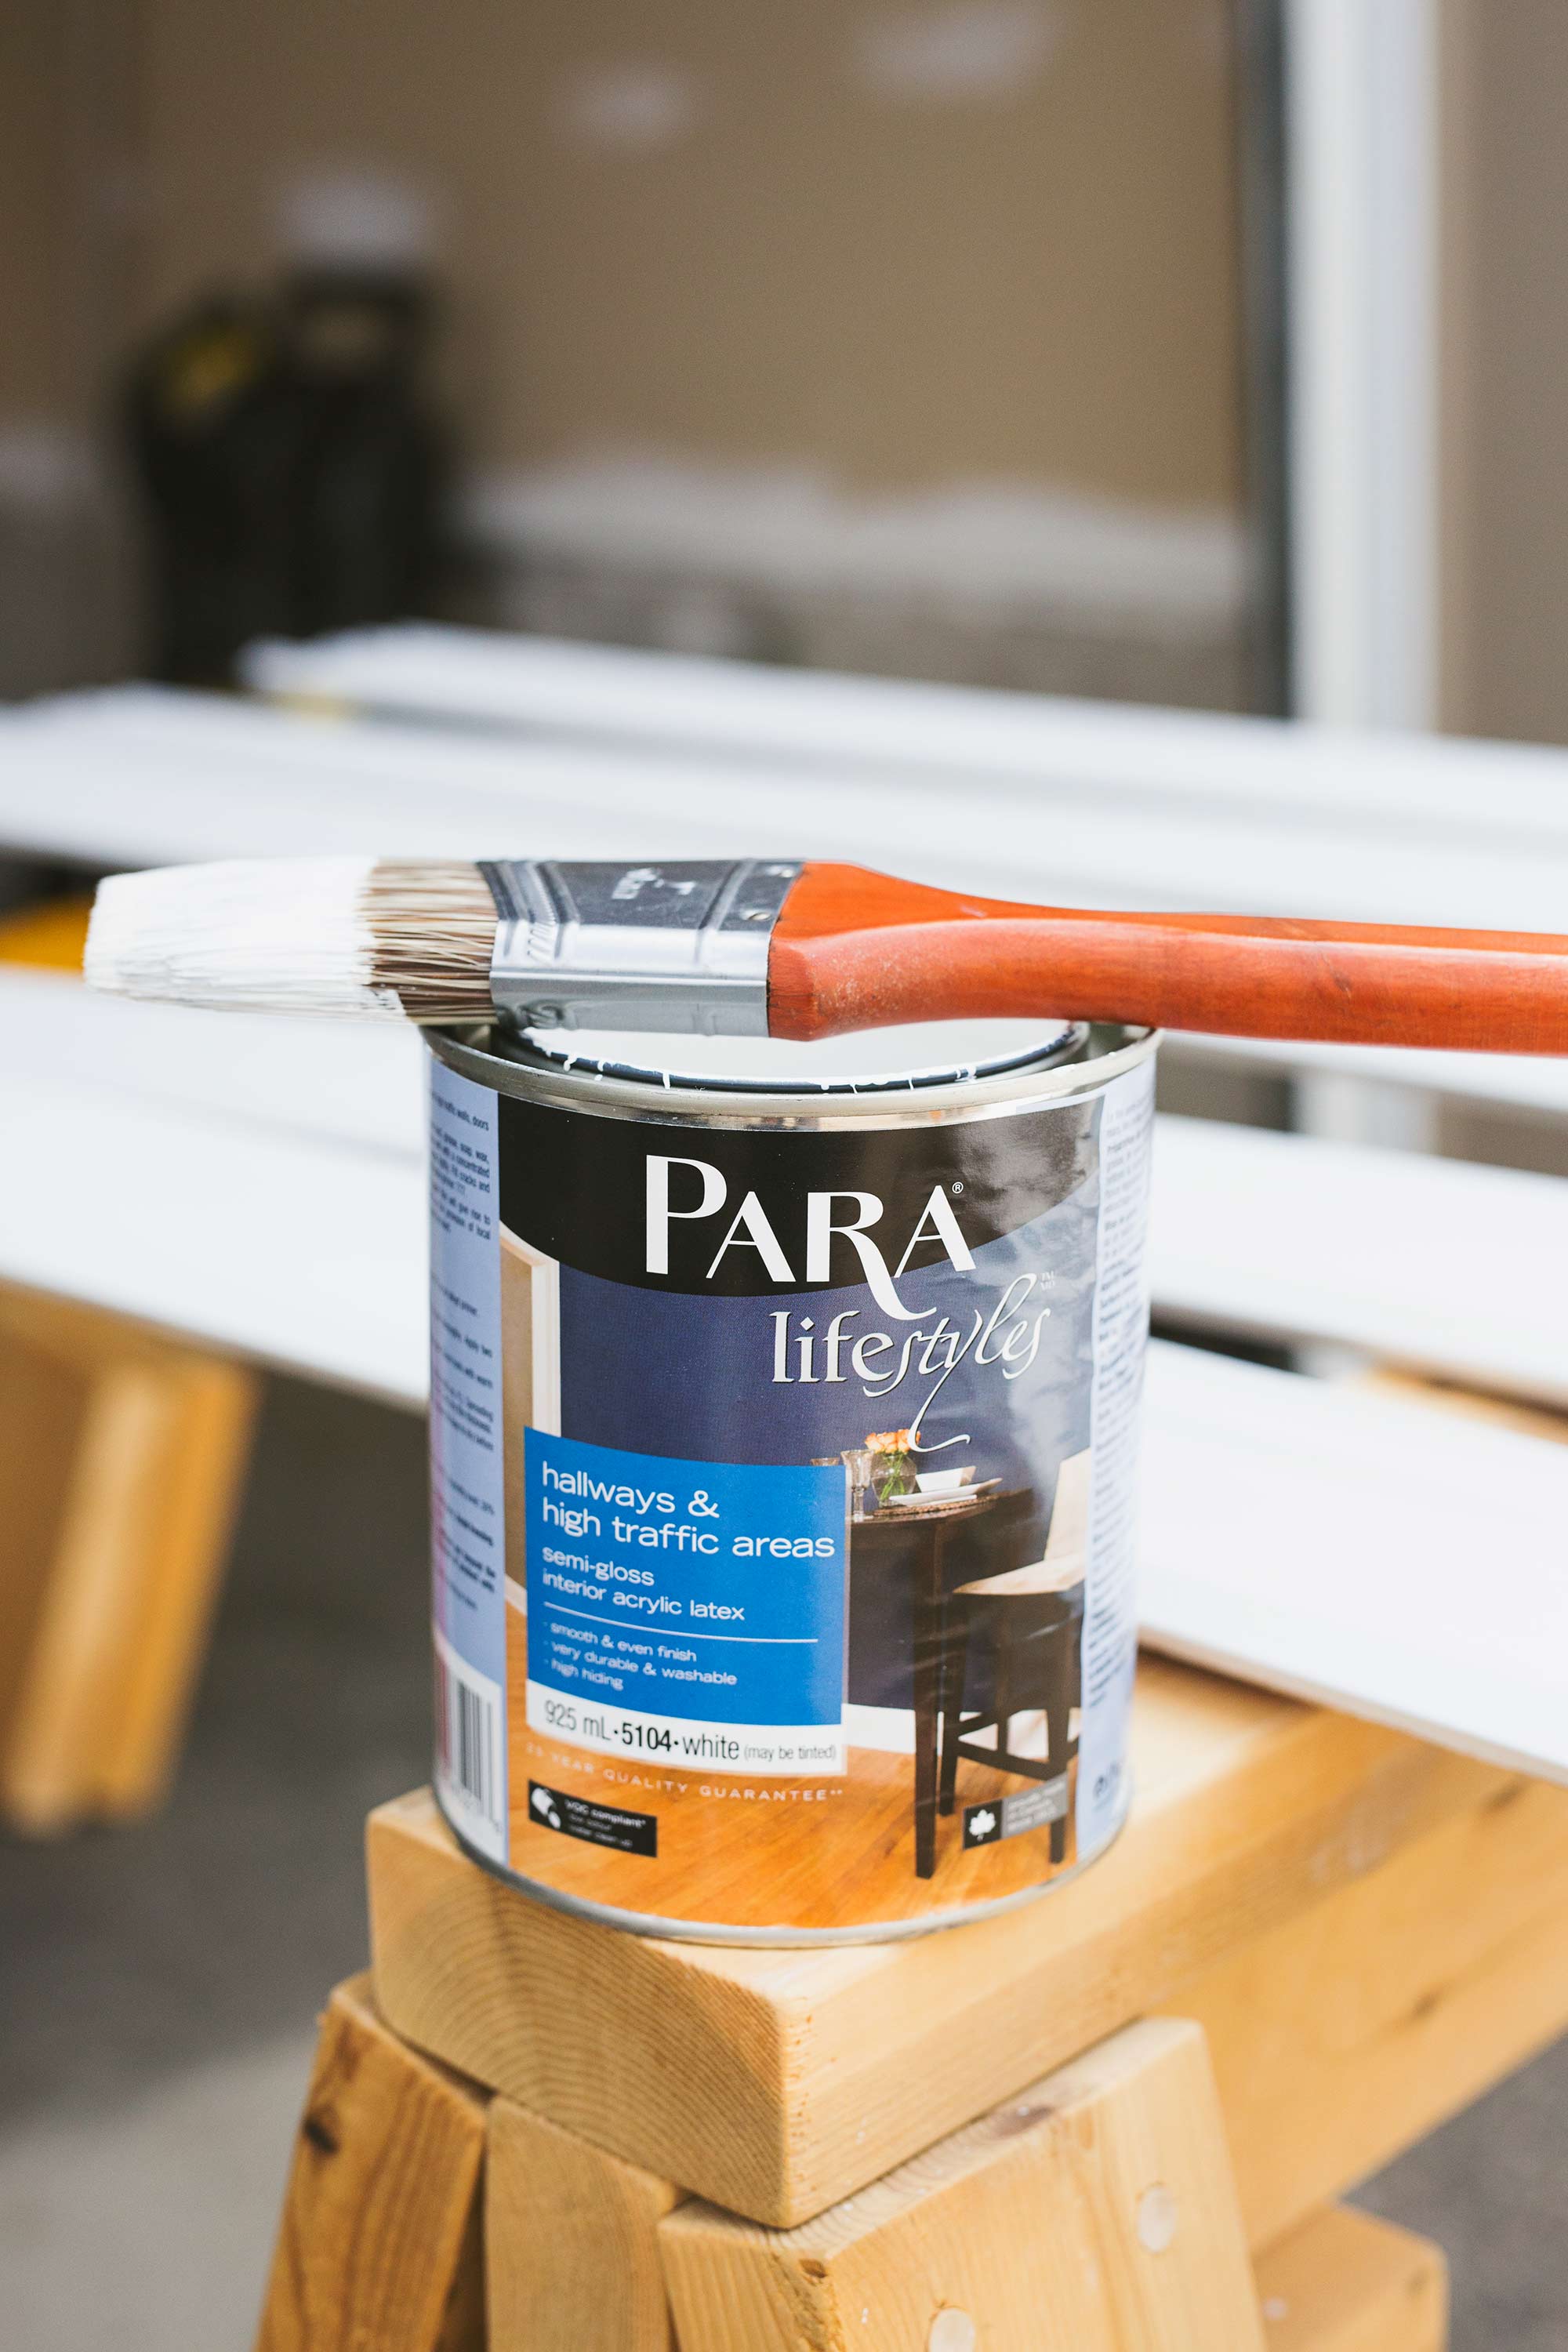
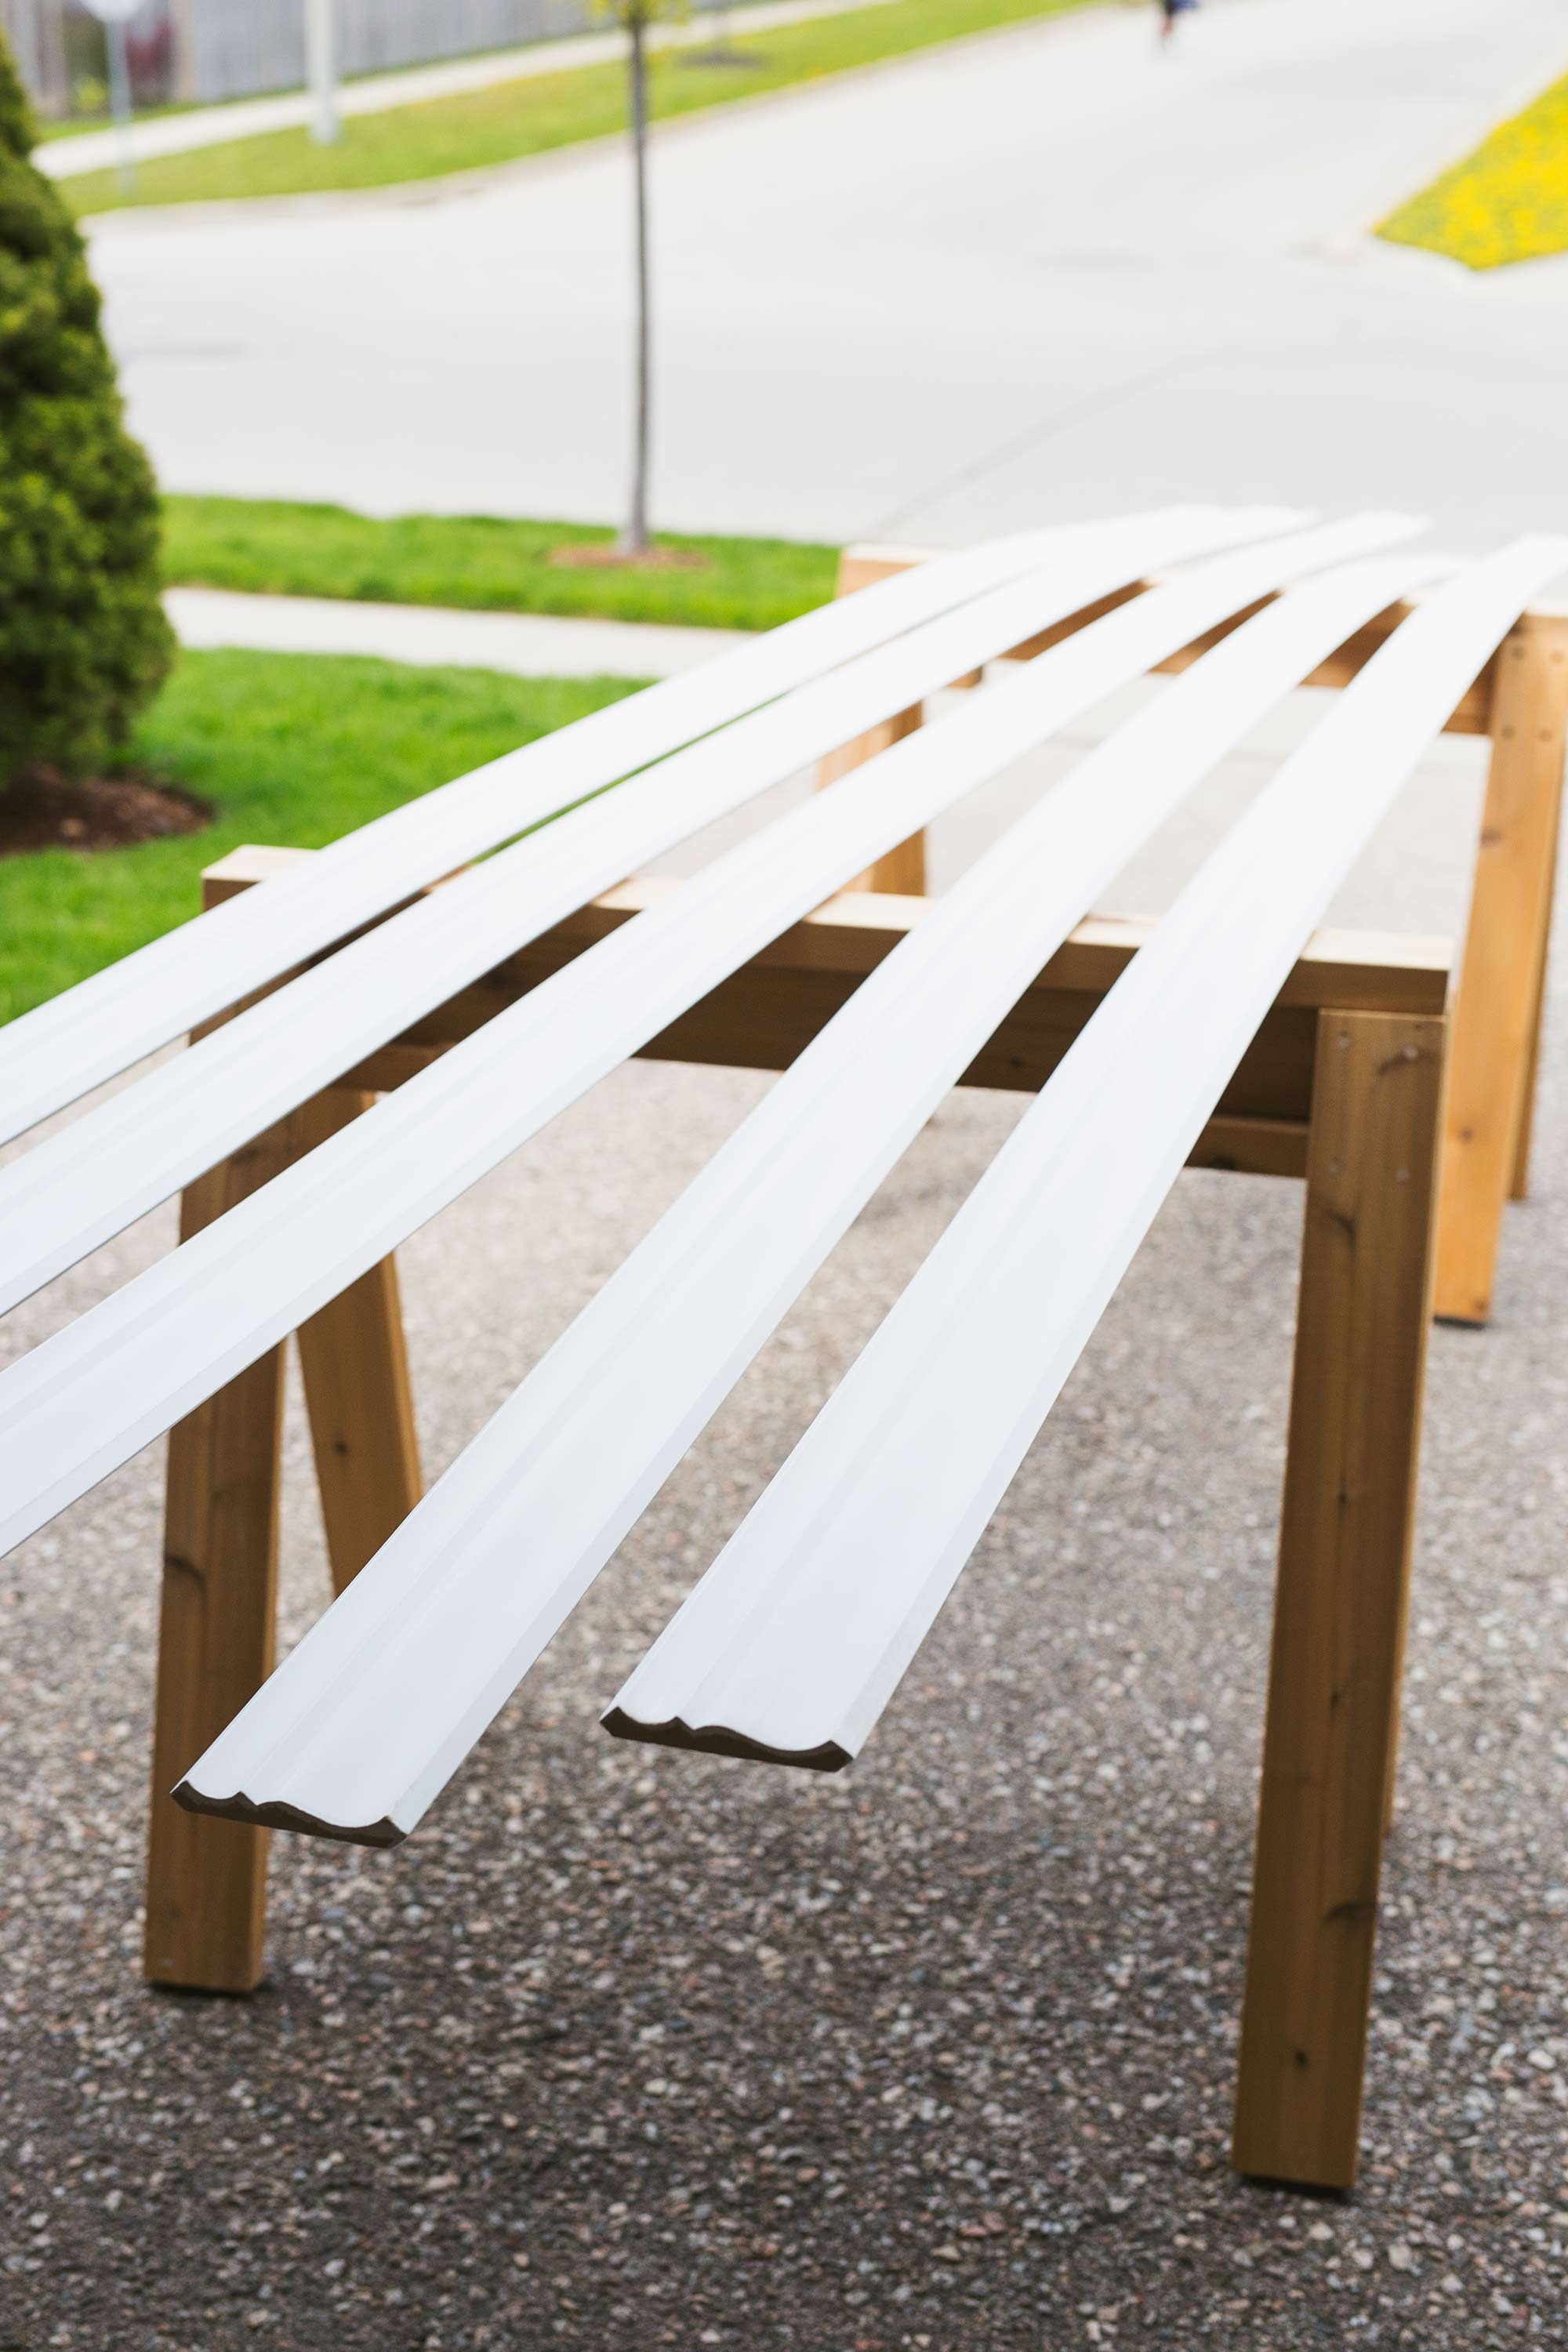
The first step in installing crown moulding is actually the easiest; paint it. The Alexandria Moulding that I selected is a fibreboard that is already primed, so painting it with two coats of Para Semi-Gloss High Traffic paint was a breeze. I opted to paint it before it was installed so there would be less precise and strenuous work to do once it was installed (ain’t nobody got time for all that taping & cutting-in!). Efficient or lazy? Let’s go with efficient! 😉
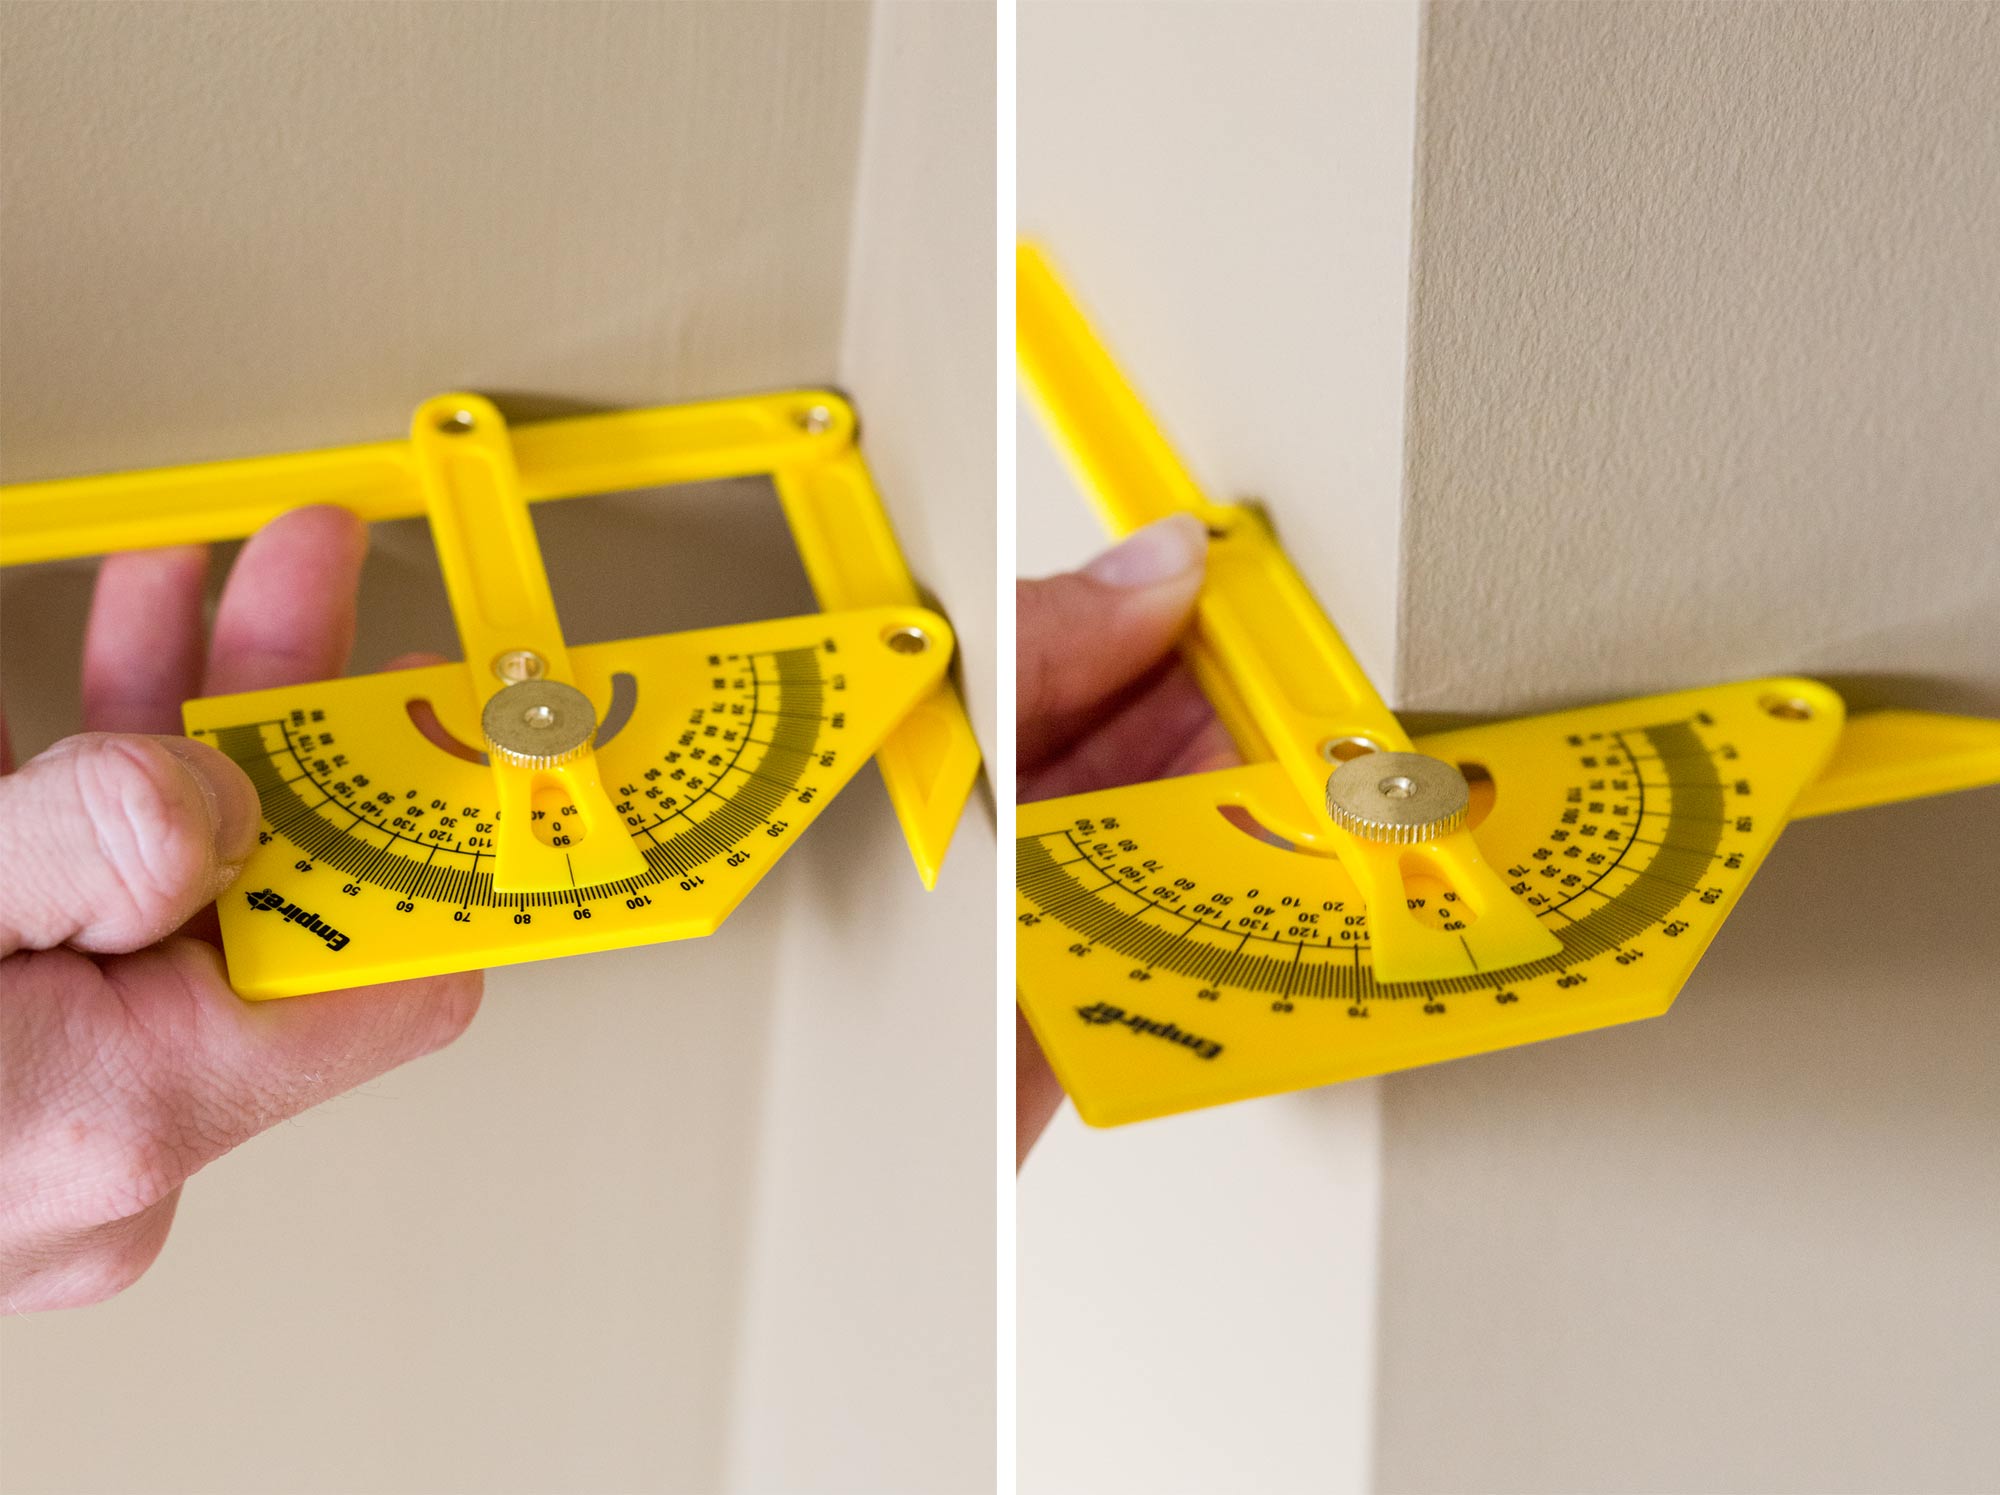
Rather than watching the paint dry, “J” and I decided it would be in our best interest to get the room all measured up, check the angles of the walls, and make several practice cuts. As much as we’d all like to believe our houses are built in a completely square manner, that’s not often the case! Checking your interior and exterior corners is one step in making sure you don’t go crazy and pull your hair out when you cut at a 45-degree angle and nothing seems to fit… because chances are it’s not you, it’s your house. I mean, check out that protractor below… not quite a 90-degree angle there! If you have a really precise miter saw you should be able to cut that an angle slightly less than 45-degree, if not don’t fret, drywall compound and caulk does wonders!
Once you are all measured up and the paint on the moulding is dry, it’s time to cut! Now this is where my mind seemed to get a bit screwy… you see, when it comes to crown moulding the sky is purple, cats are dogs, and it rains from the ground up. Makes sense right? Not really… Knowing it was a hard thing to visualize “J” and I made templates from the several practice cuts; so down is up, left is right, and right is left. Once I wrapped my head around that it was smooth sailing from there!
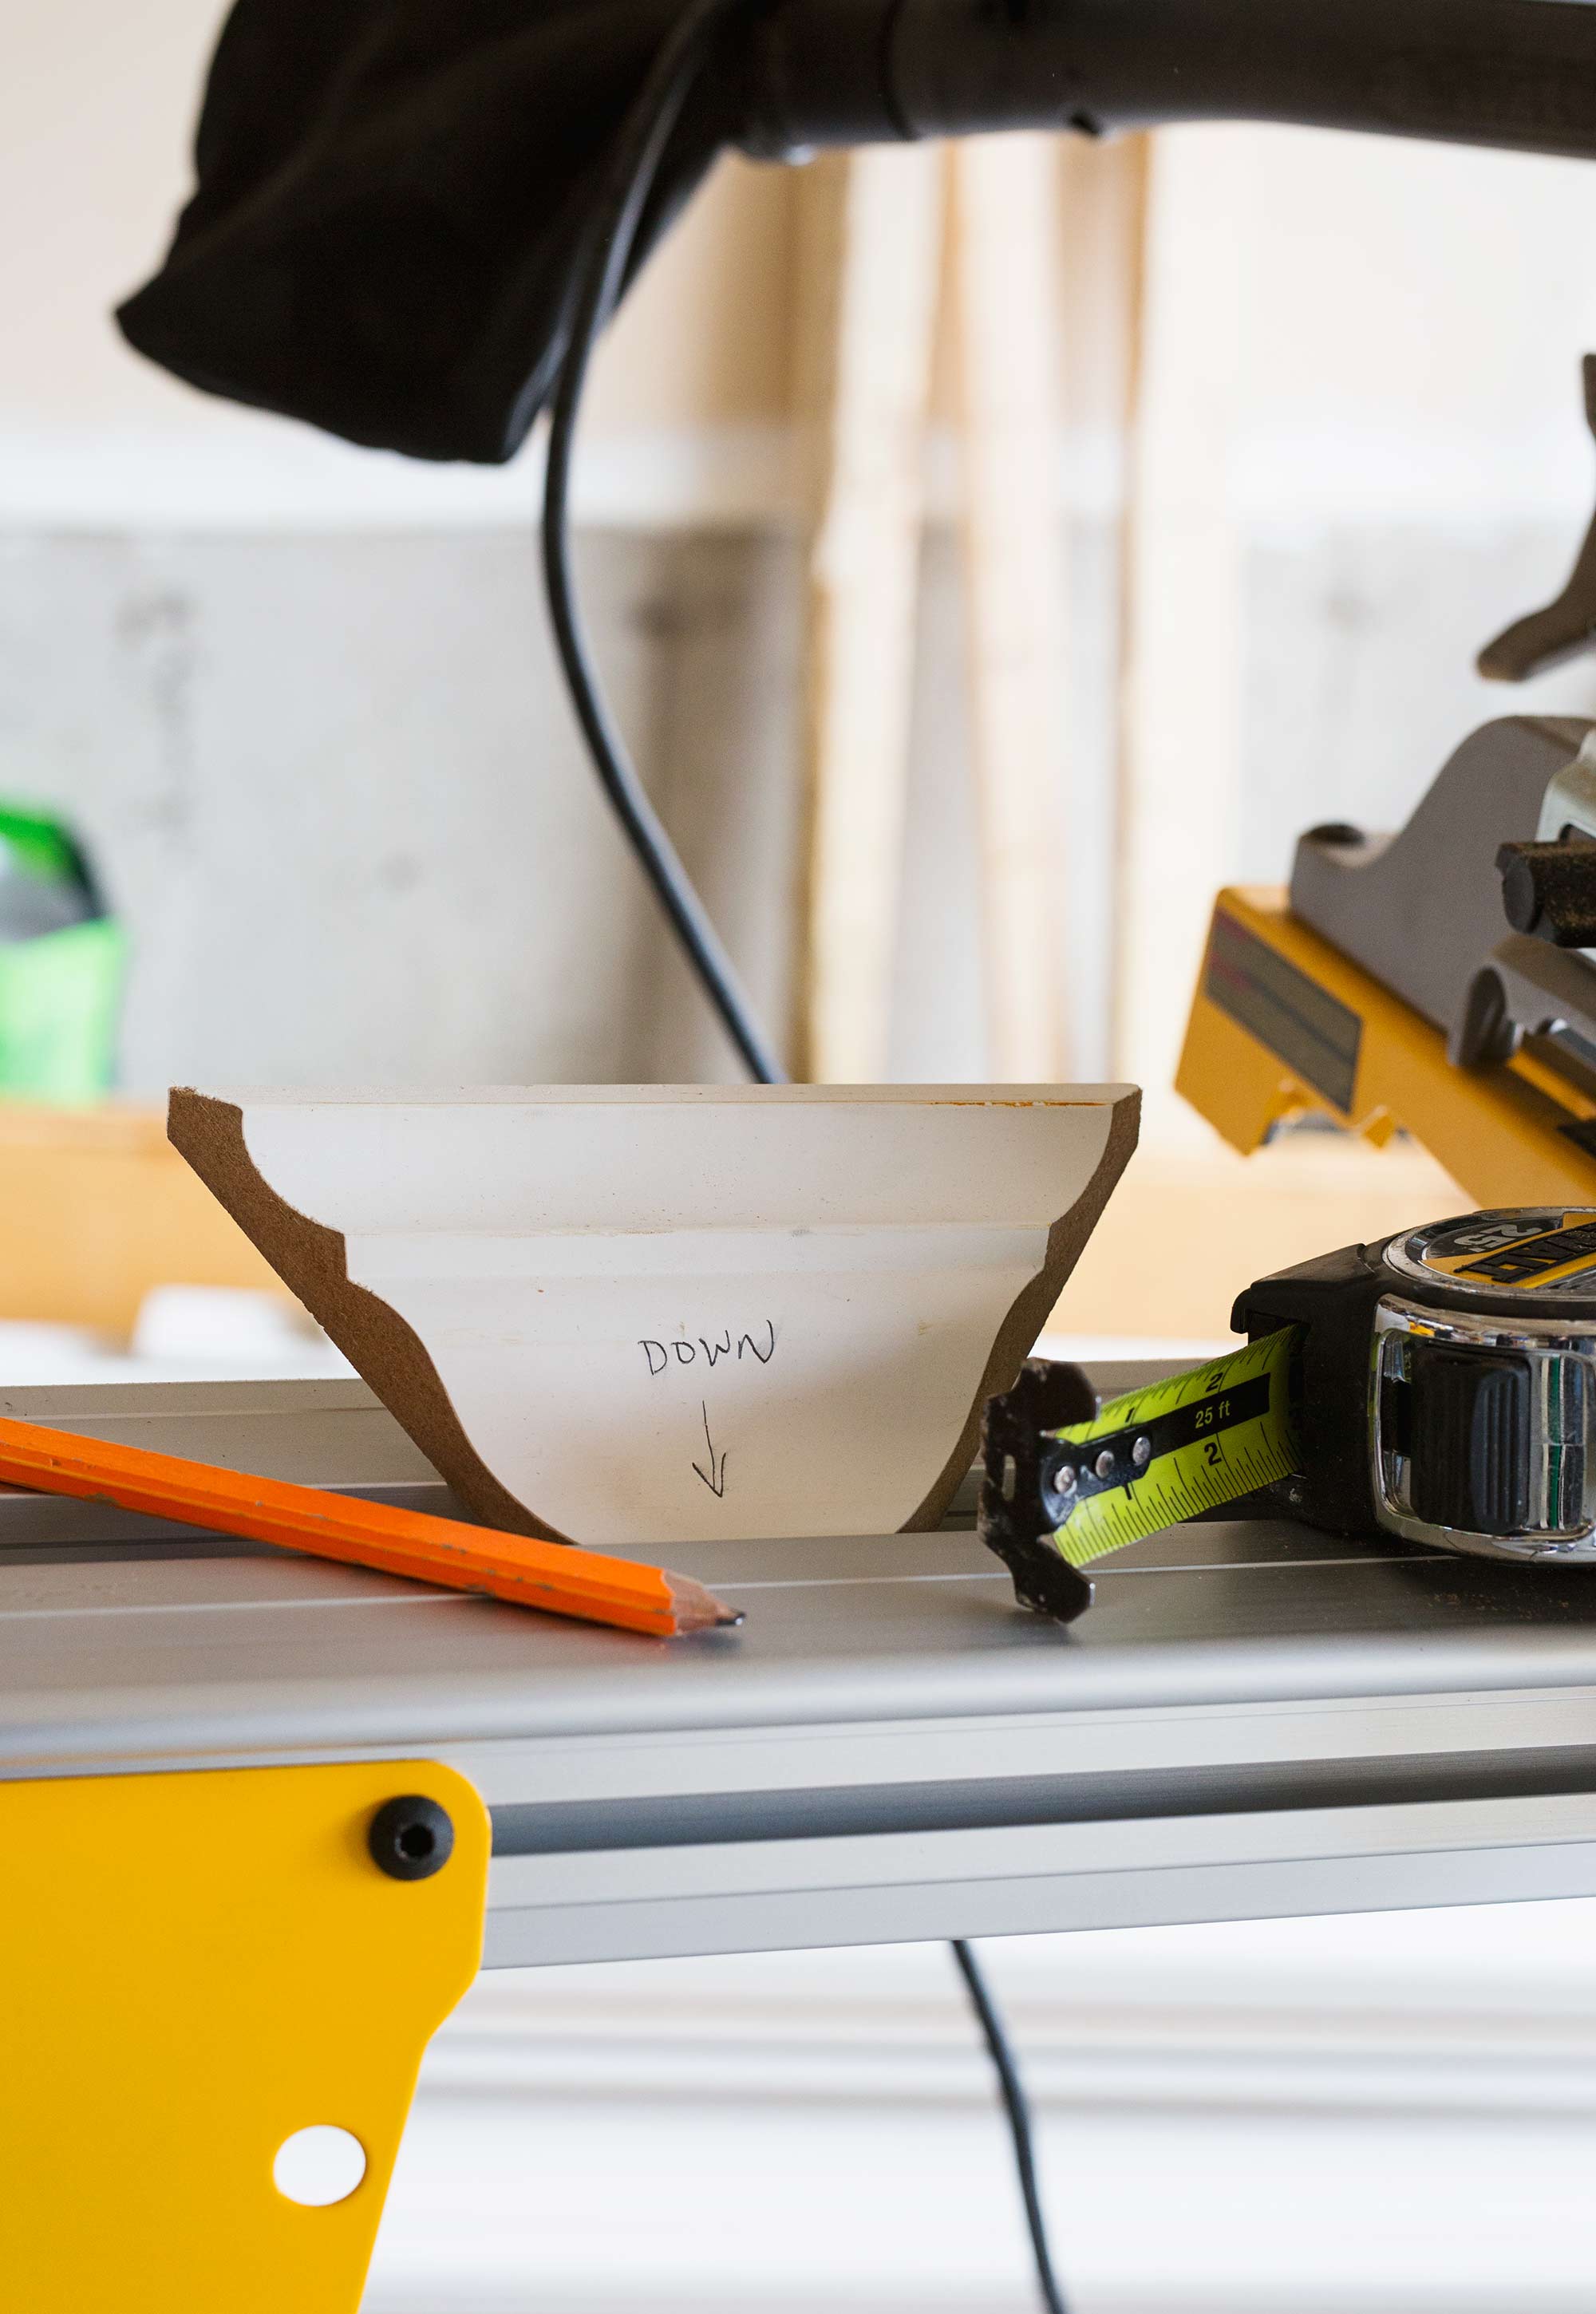
Using our miter saw we precisely cut each end of the moulding based on the angles we recorded when we measured up the room. Most cuts were for interior joints, however we do have one small wall that required one exterior cut. When you have to switch to an exterior cut remember to keep your templates handy!

Lucky for us our 14ft pieces were just long enough to do the entire stretch of wall, so we didn’t have to do any scarf joints (hoooray for less cuts)! But if you find yourself needing to join two pieces of moulding together simply cut the ends where you will join the two pieces together at a 30-degree angle. This will allow the face of one piece to overlap the back of the other creating an overlapping joint. Making sure your joint falls on a stud will also help when you nail the joint to the wall, ensuring that it stays flush!
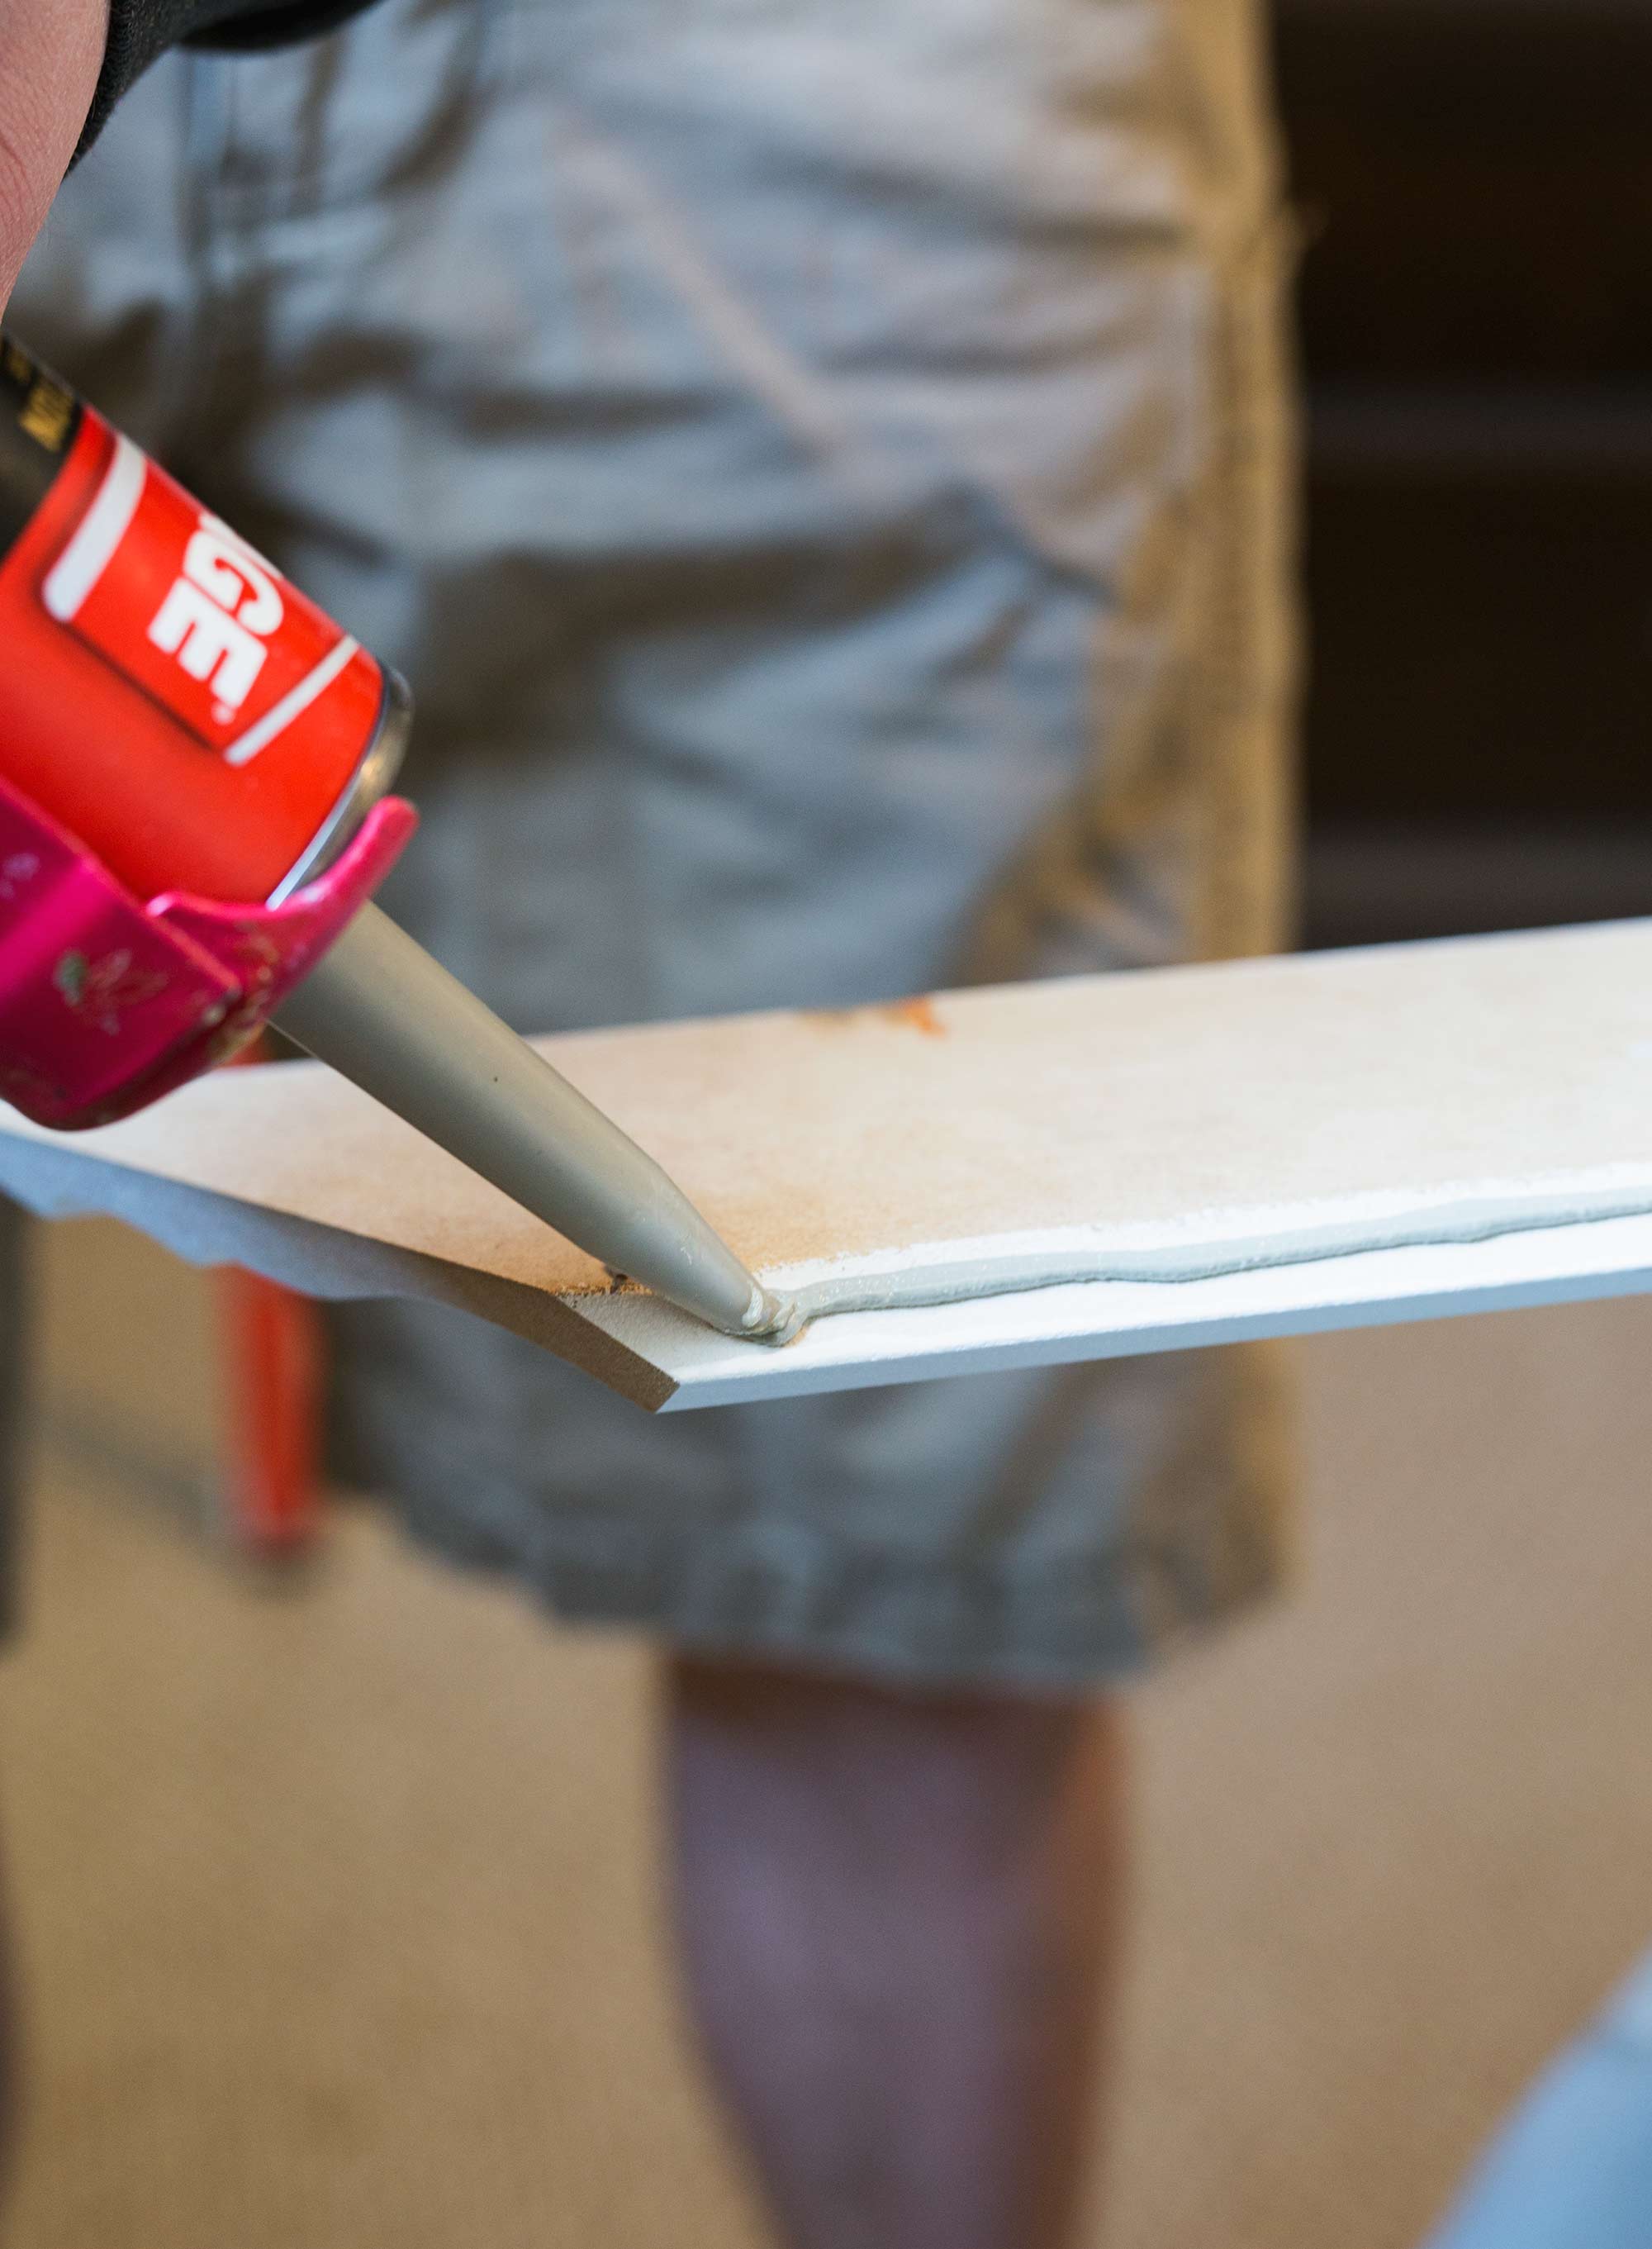
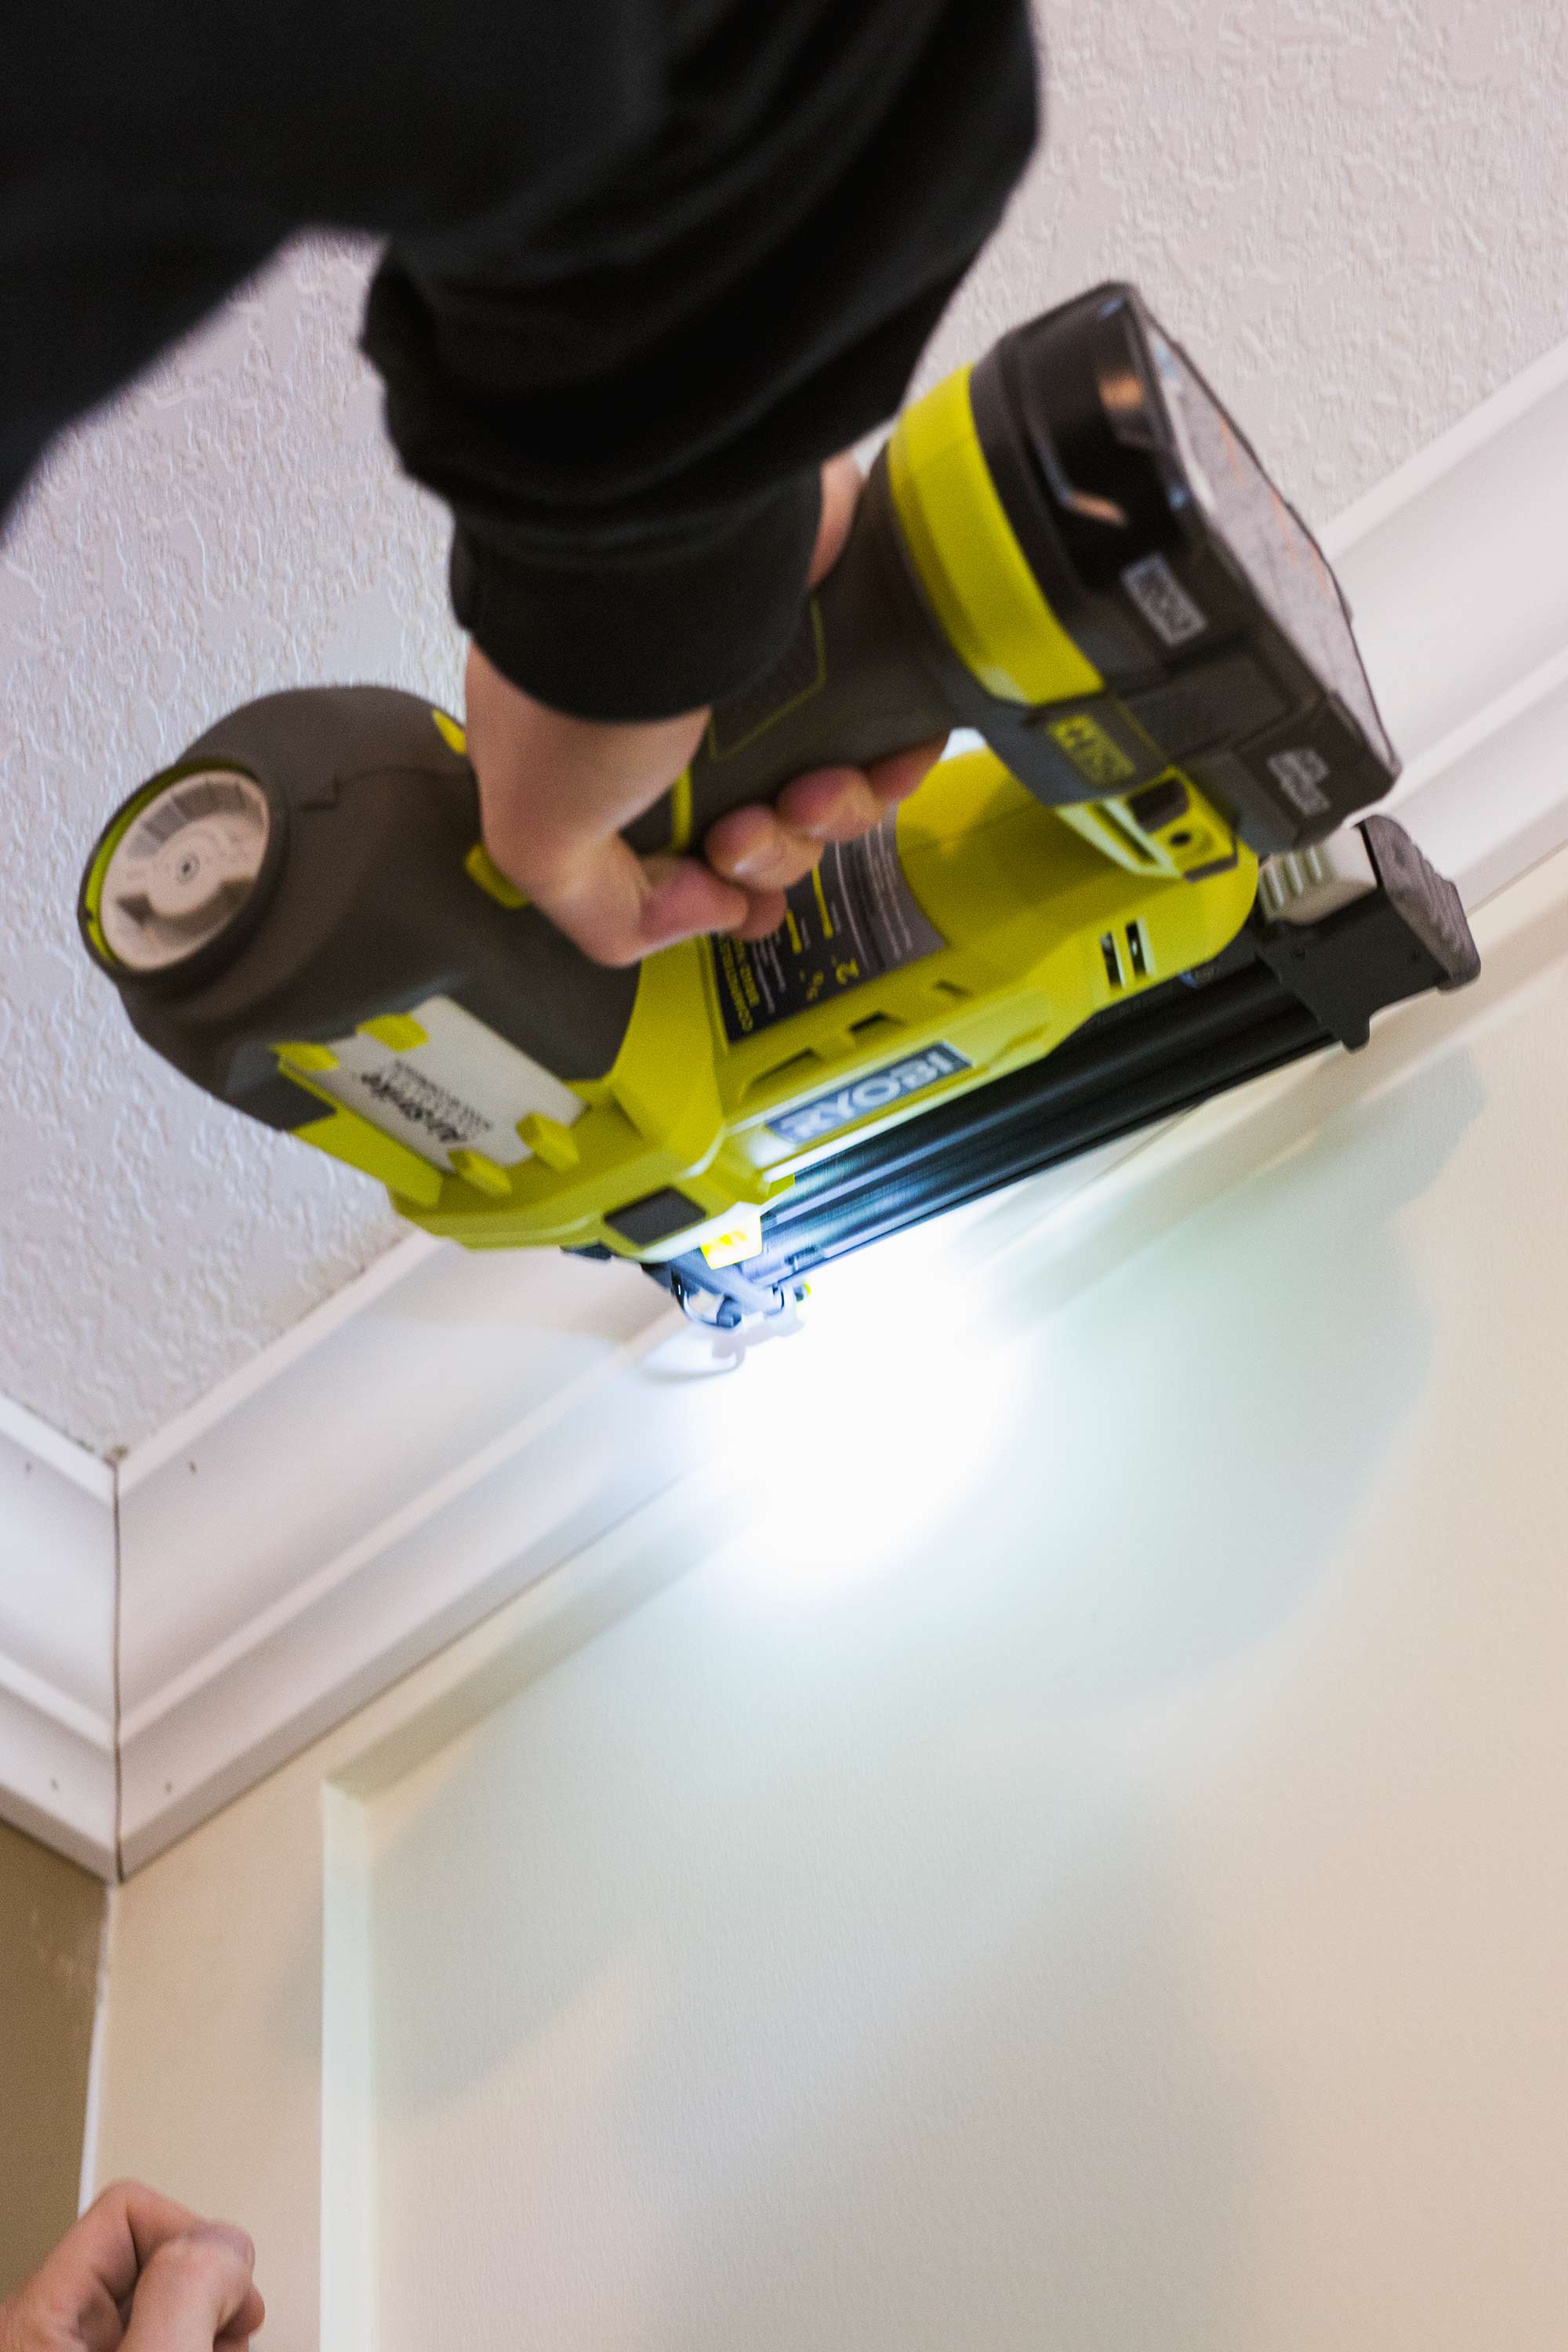
Now this step is not critical, but “J” and I really wanted to make sure this moulding wasn’t going to fall down, so we ran a very small line of adhesive along the edge of the trim that makes contact with the ceiling, and then used our RYOBI brad nailer to nail the trim in place. Let me tell you, the RYOBI brad nailer is a great tool to have in your tool chest! You never know when you are going to need it, and when you do, you are glad you have it!
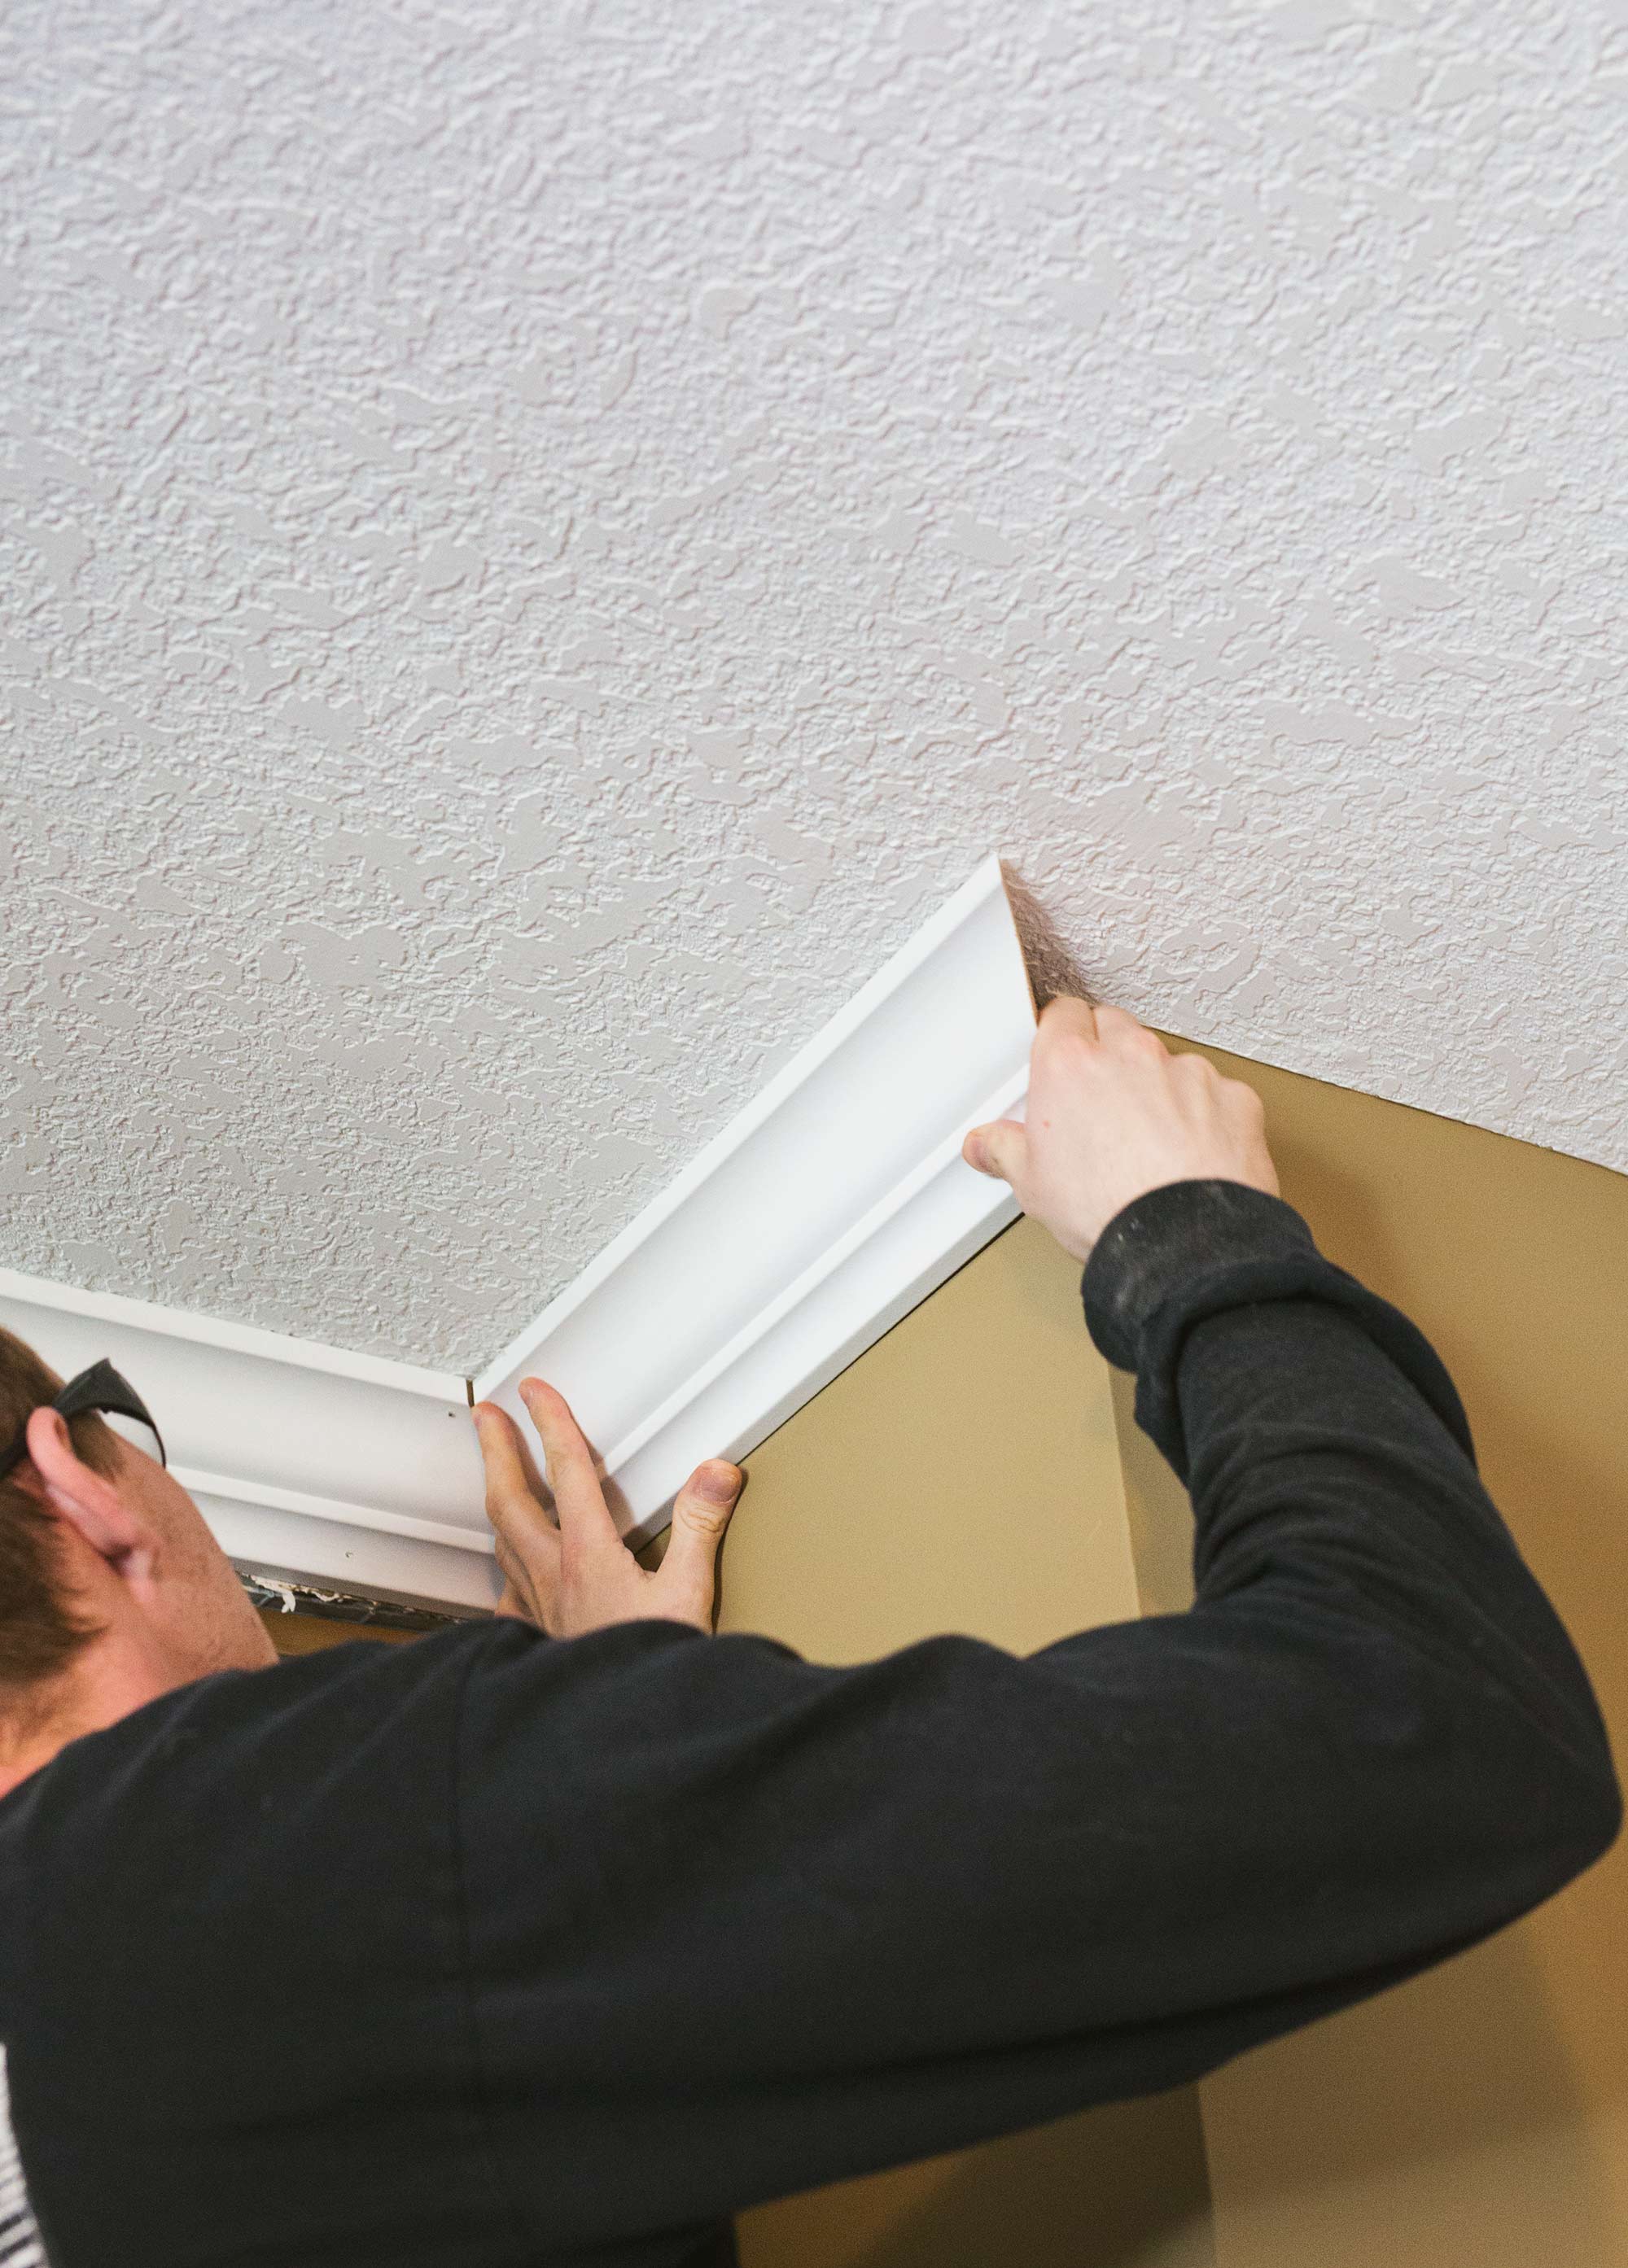
If there’s one tip I can give you for a project such as this it’s to make sure you have two people! I couldn’t imagine installing the long pieces of moulding myself. You definitely need to be precise with the angle at which you attach the moulding to the wall and ceiling, and having two people makes it an easier task!
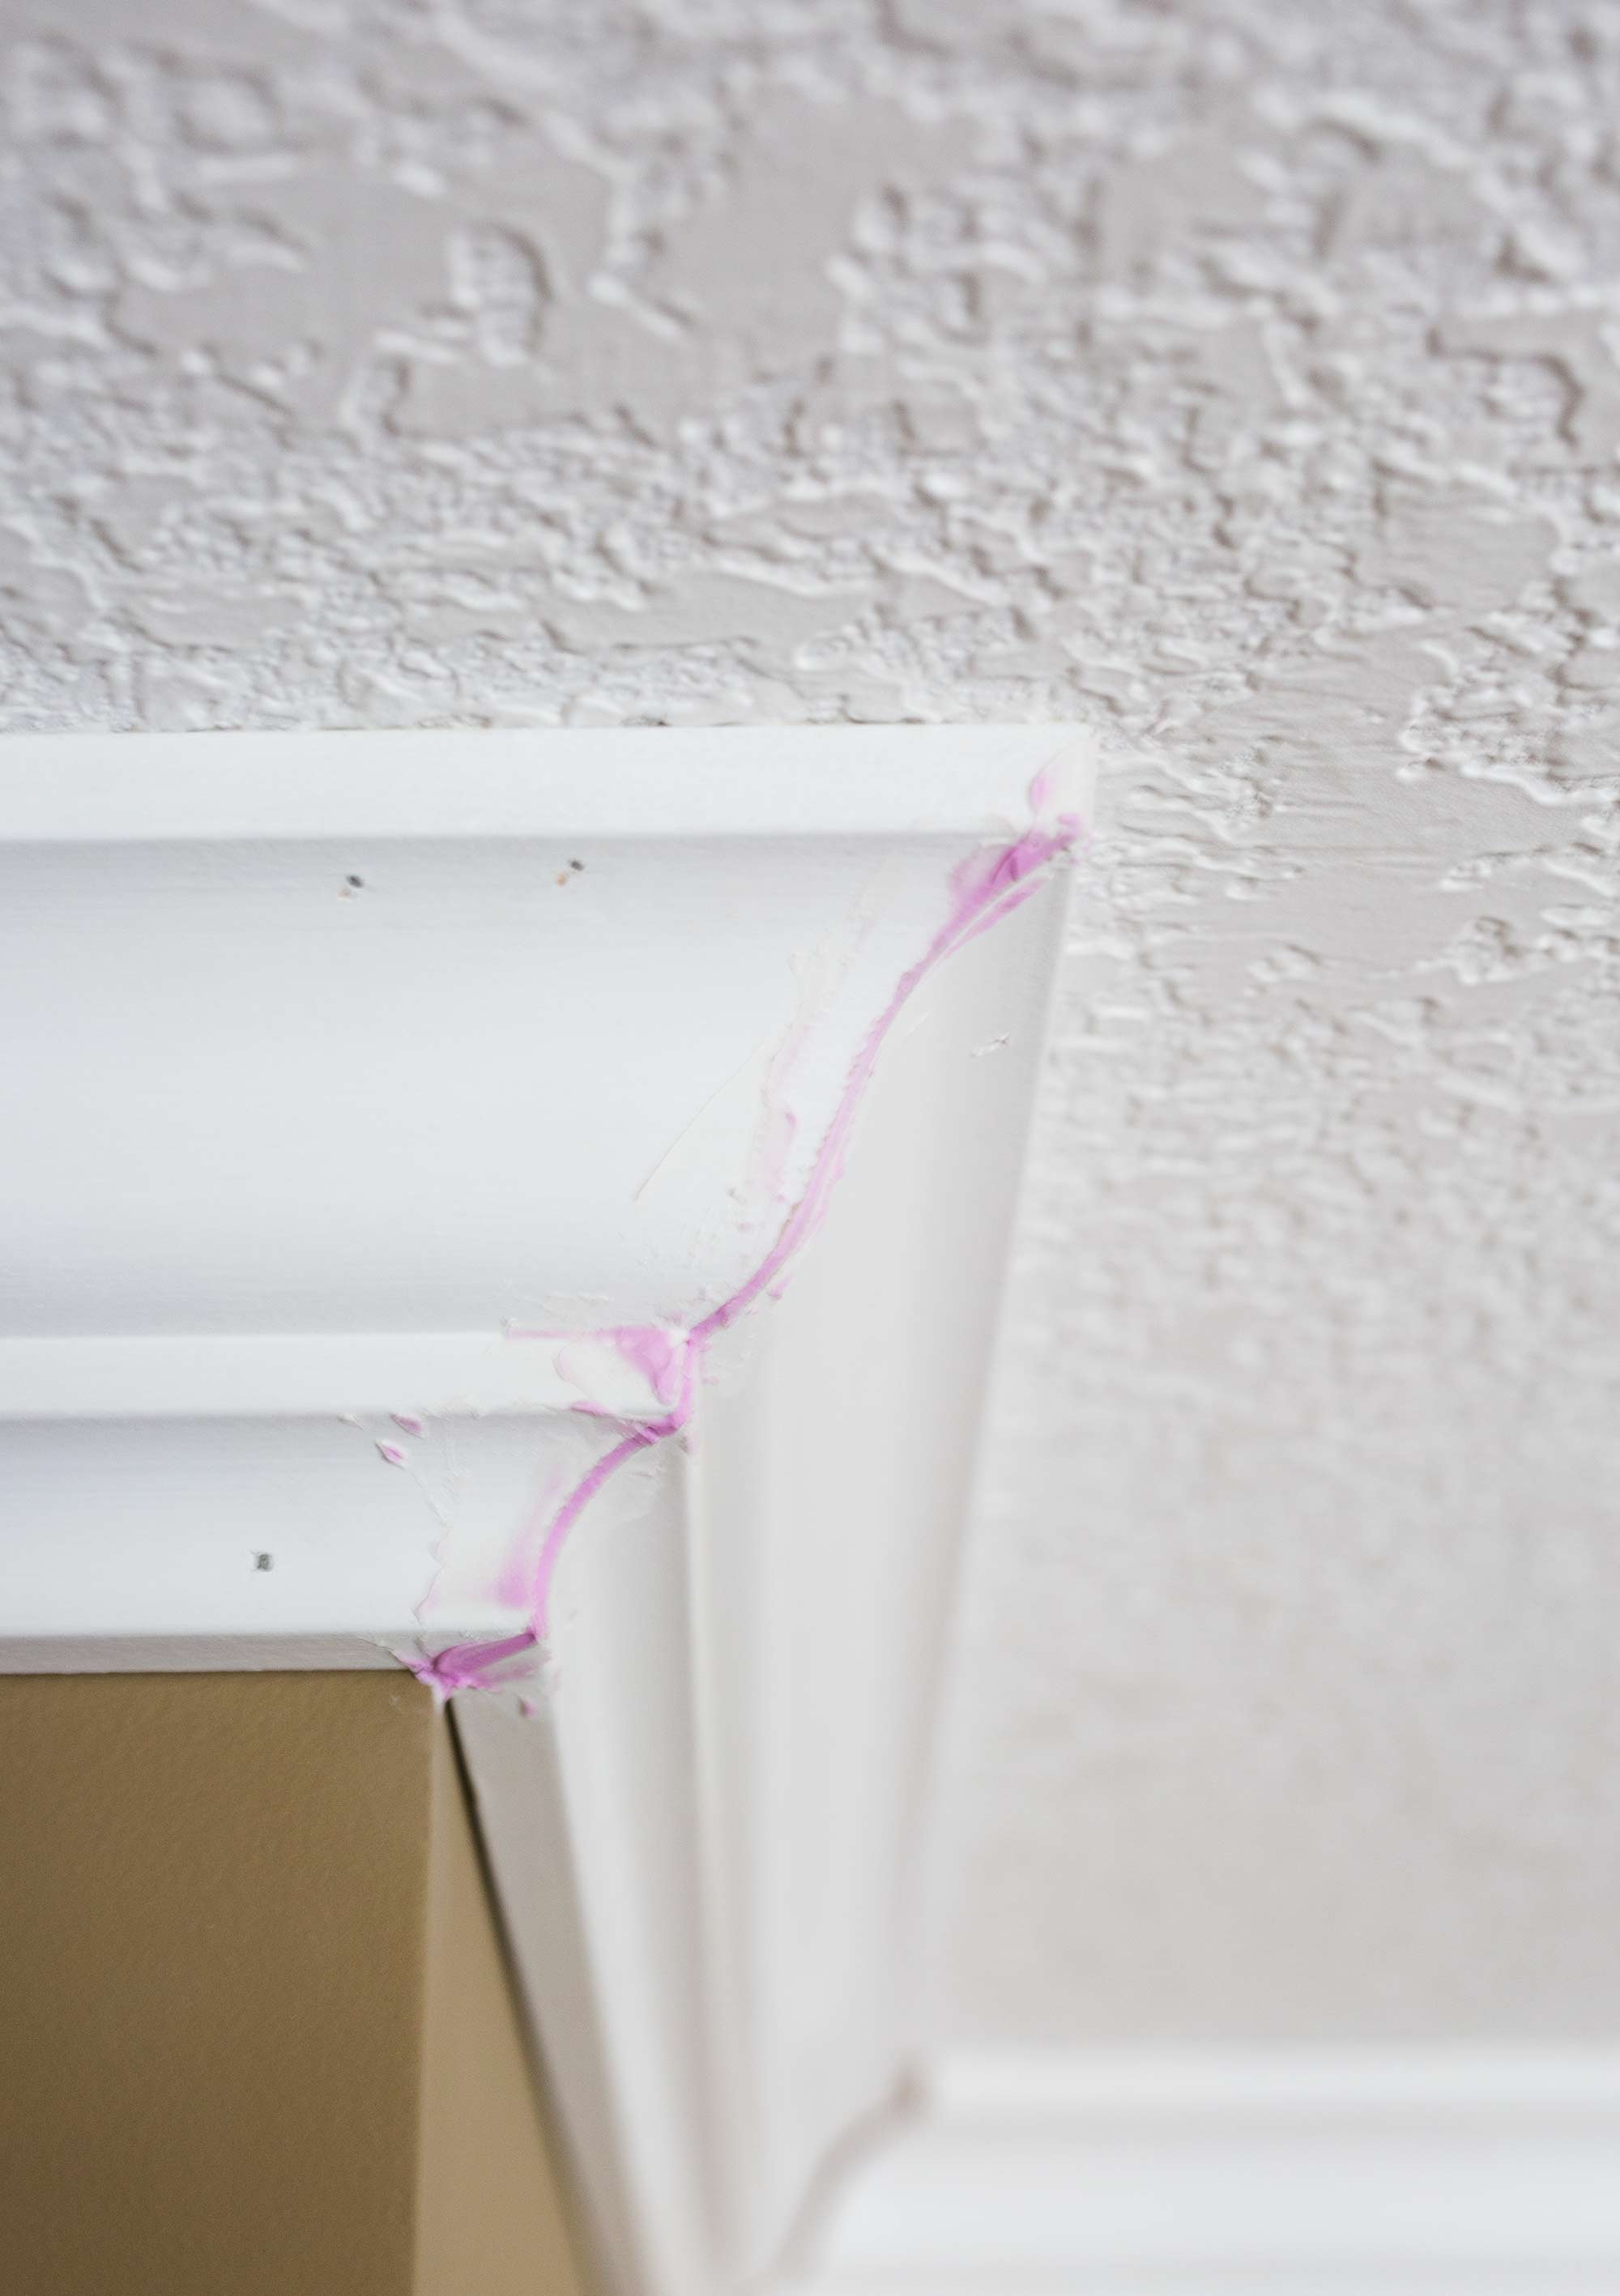
One thing we didn’t let bother us during the install process was how the trim didn’t butt up against one another exactly. In some spaces, especially the exterior joints, there was a bit of a gap.

Nothing a little drywall compound couldn’t fix! I simply pressed the compound into the joint until it was nice a smooth on the surface. Don’t worry too much about it being super clean, once the compound dries it’s easy to sand off the excess. It did look like a bit of a mess until it dried fully!
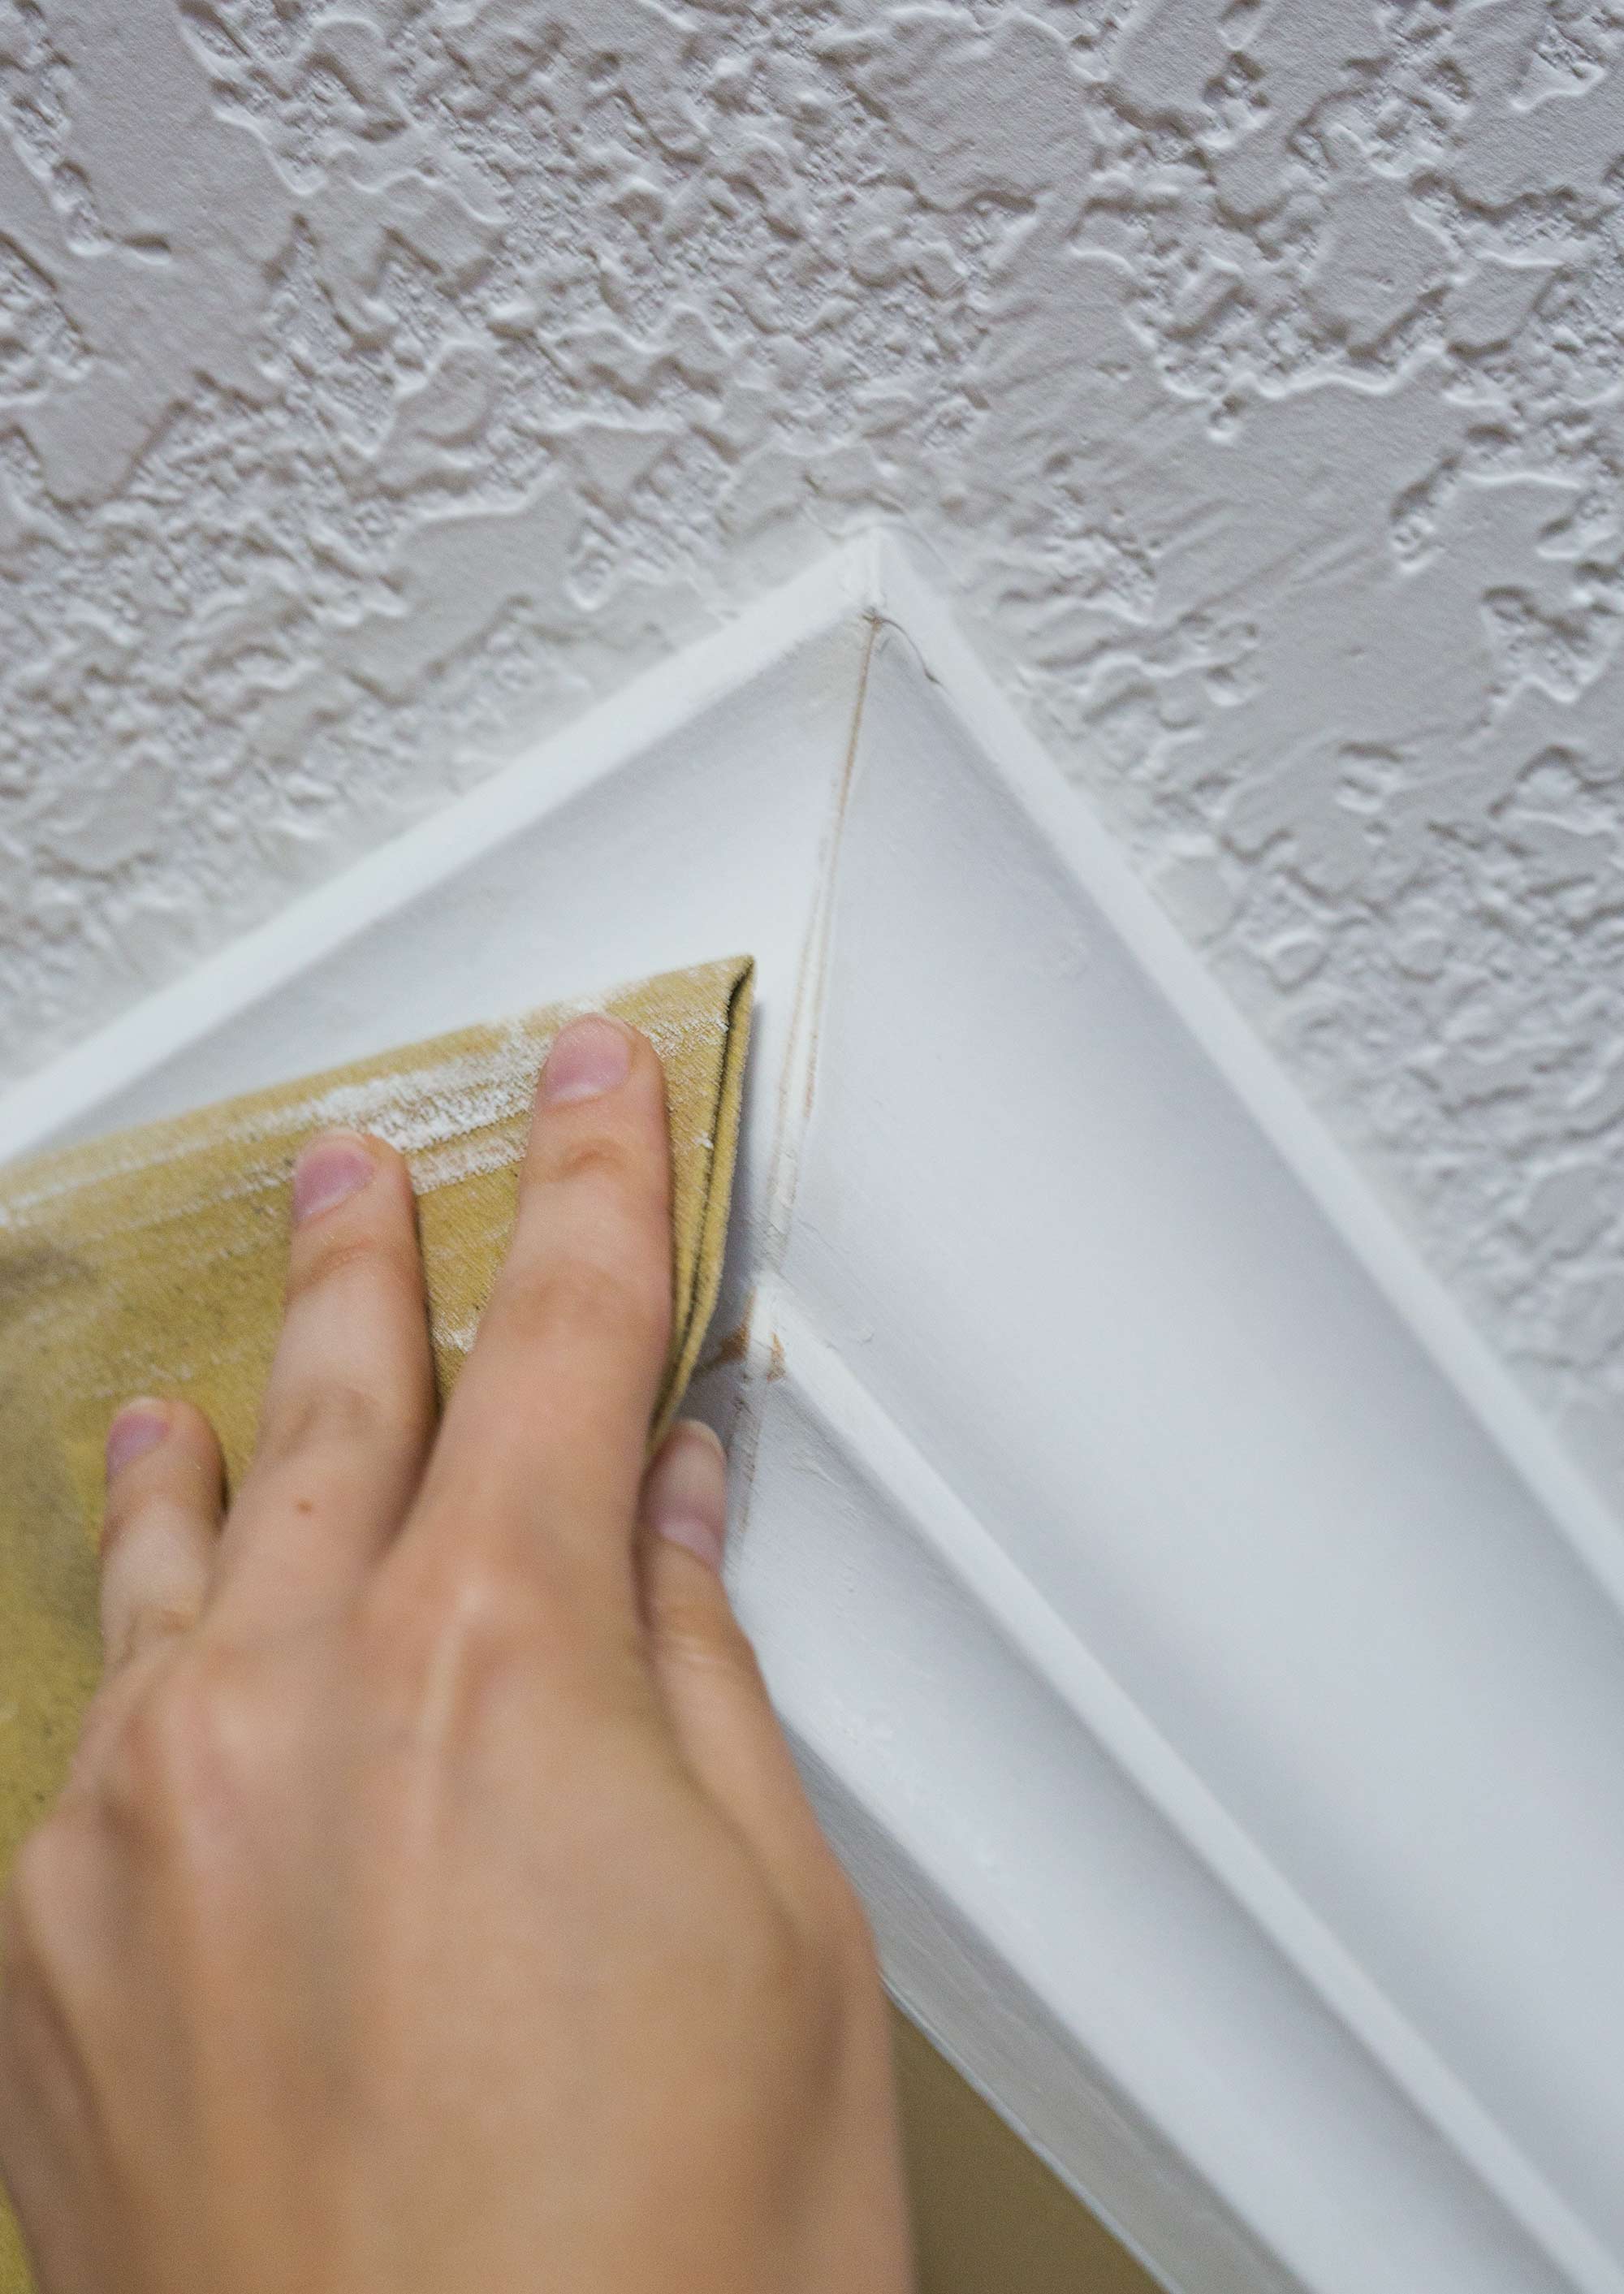
Once sanded, simply paint the joint white, and you’ll never know the difference!
I also used the drywall compound to fill the nail holes left by the brad nailer. The tiniest dab of compound filled the hole and after it was lightly sanded and painted white the holes were nearly invisible!
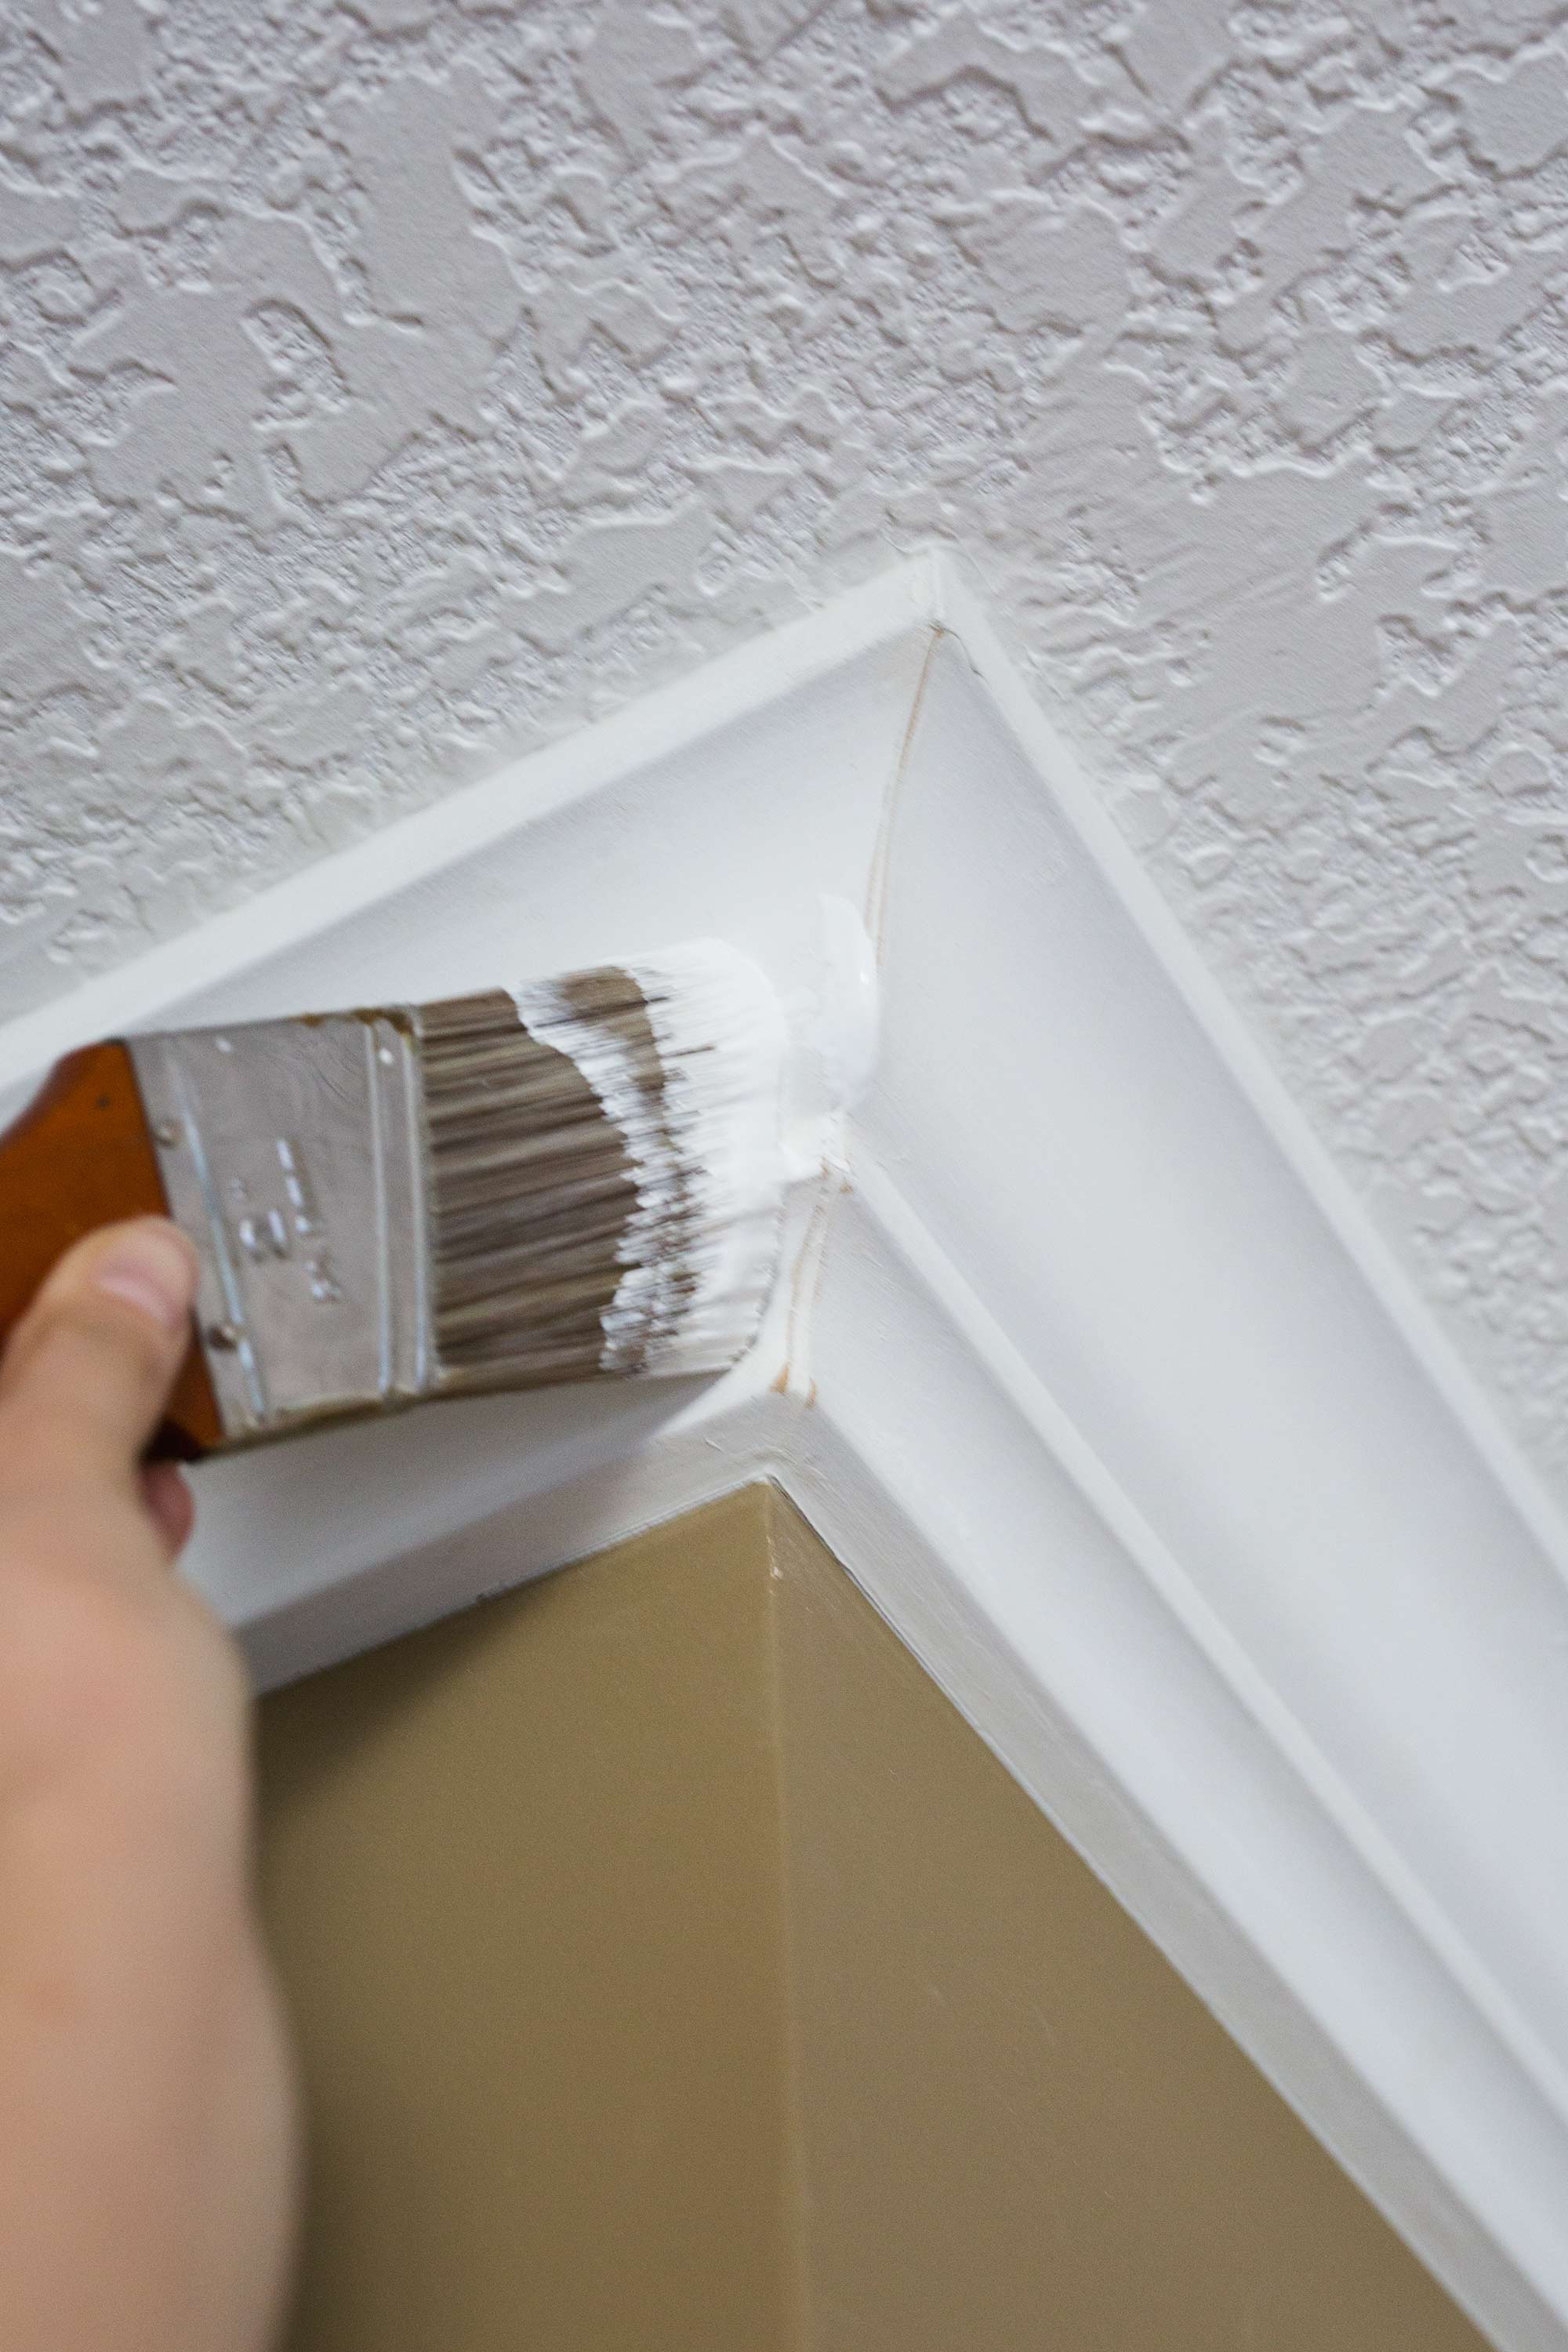
Once everything was dry we used white paintable Dap caulk (made for windows, doors, and moldings) to fill the gap between the wall and the bottom of the trim. Rather than applying freehand and hoping for the best, I like to use painters tape to create a clean, smudge-free edge between the trim and the wall.
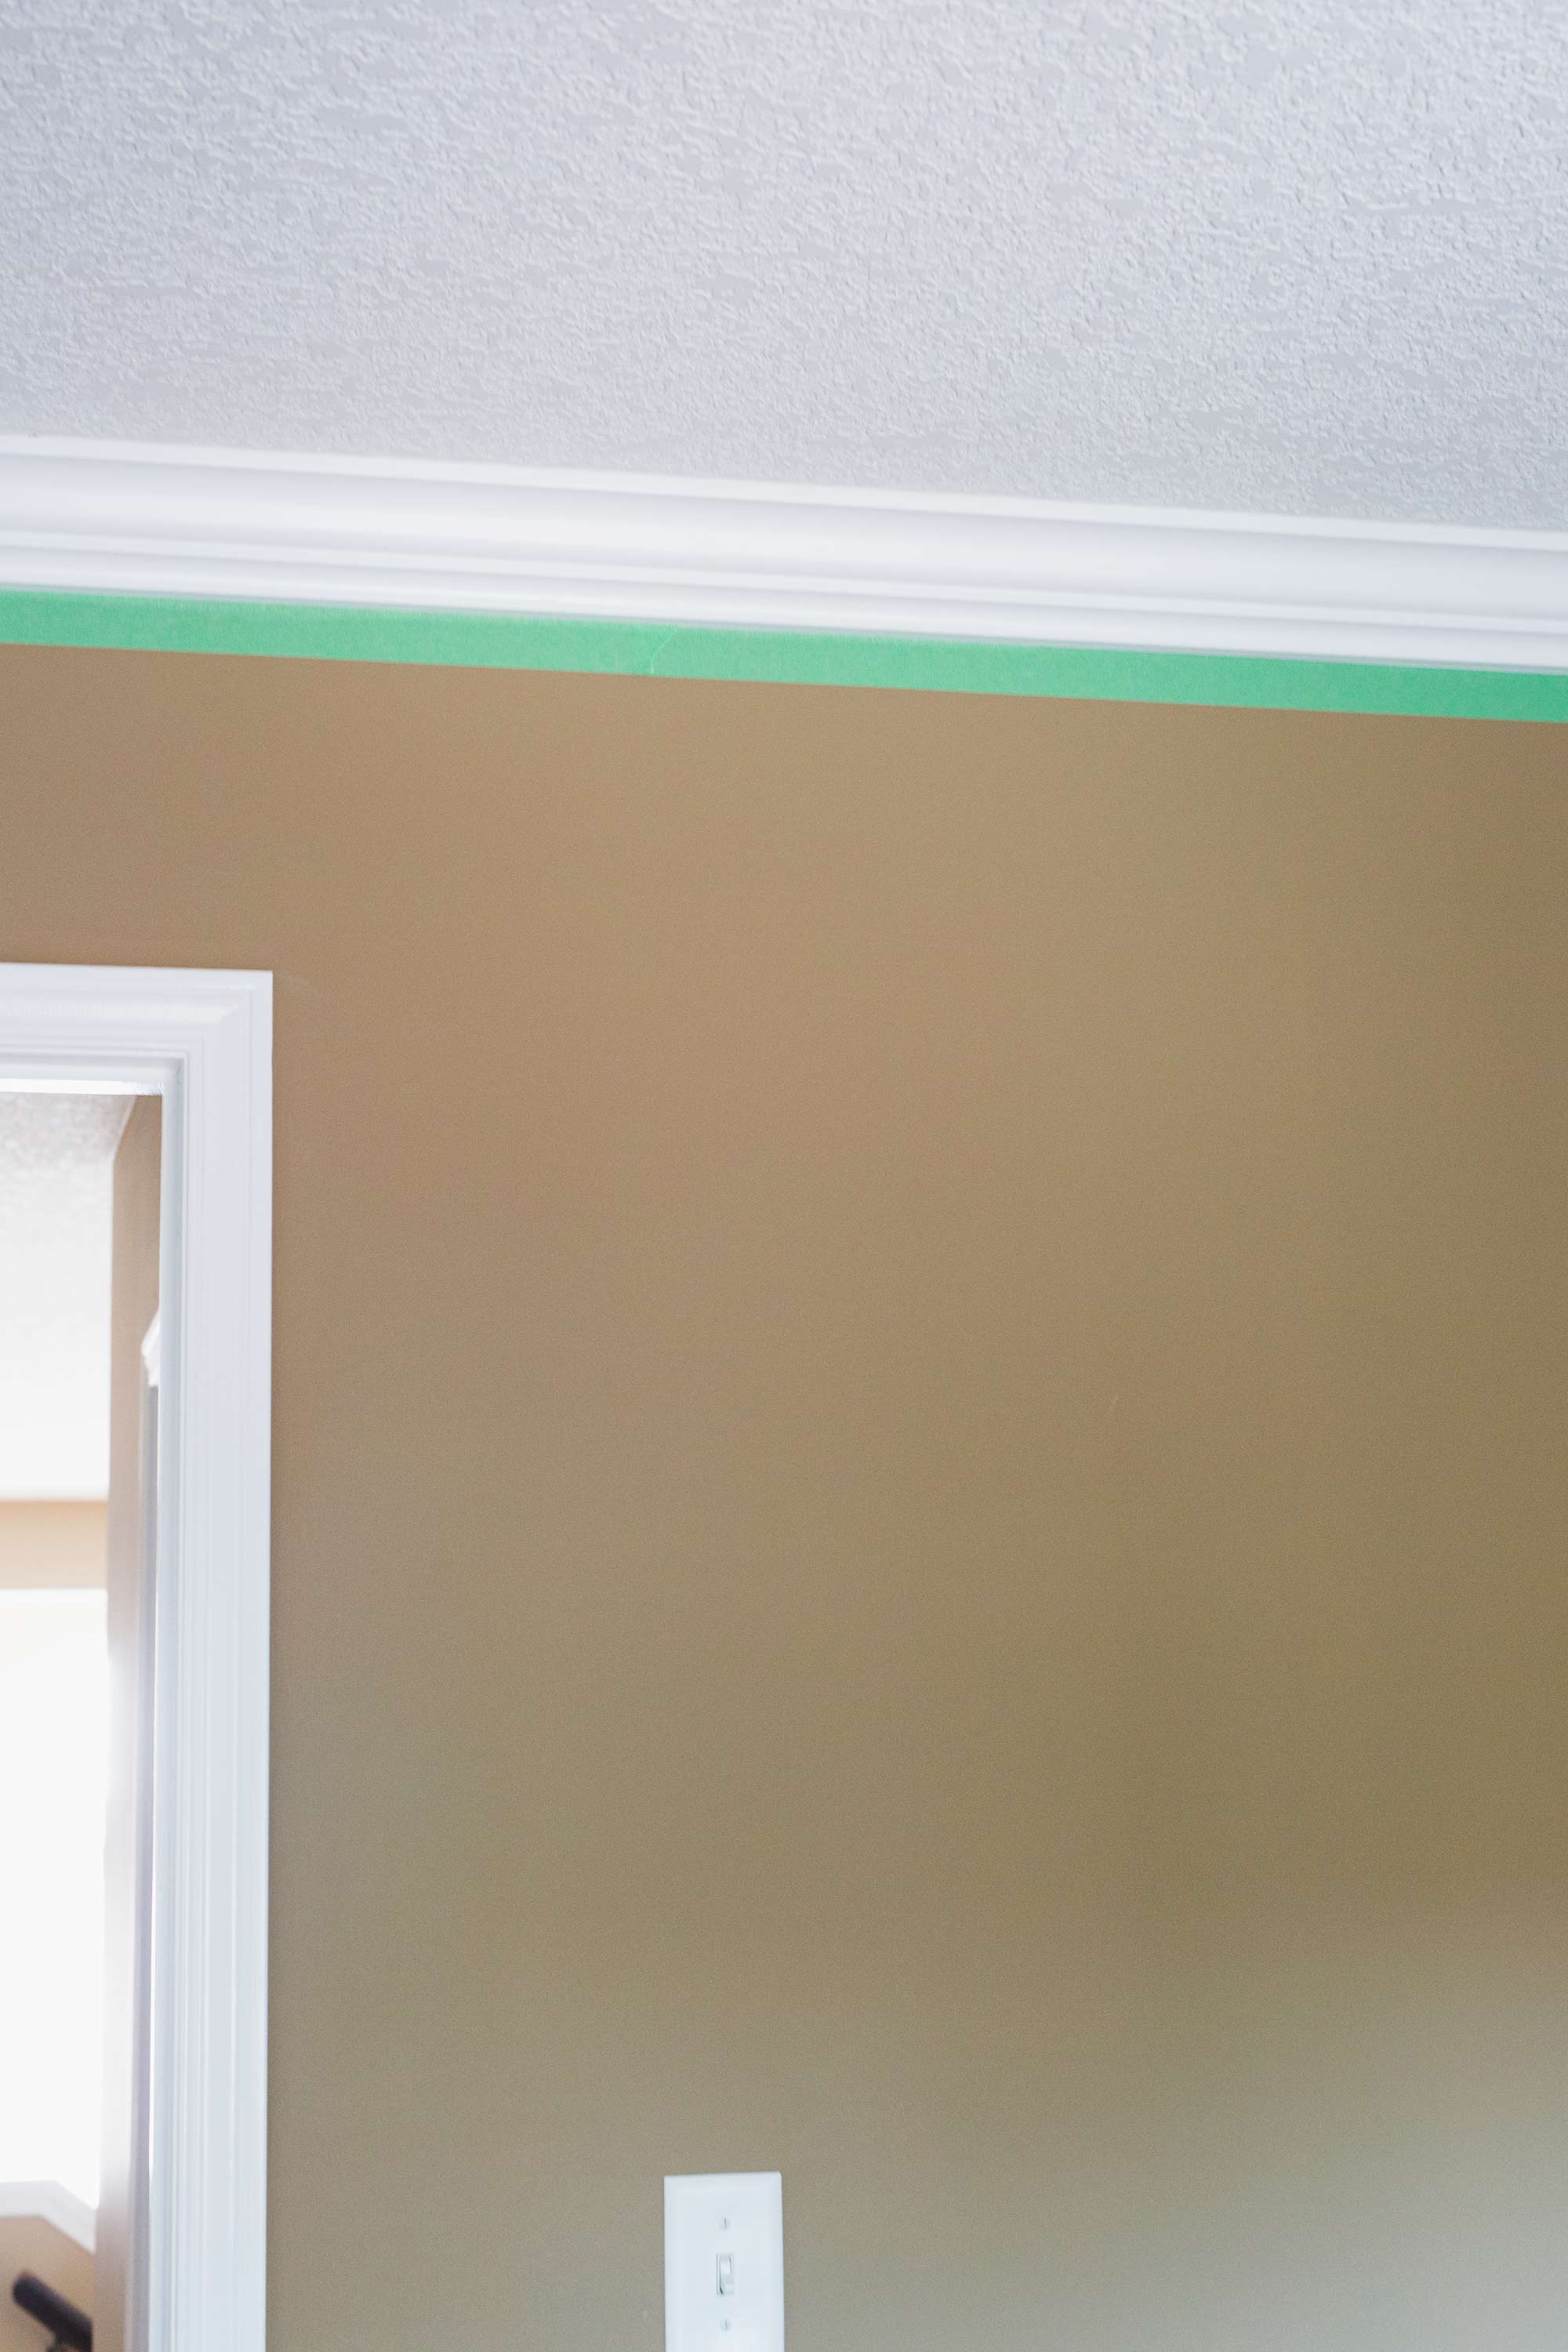
Make sure to remove the tape before the caulk is dry, otherwise the tape will pull the entire length of caulk off your trim, and that’s not good!!

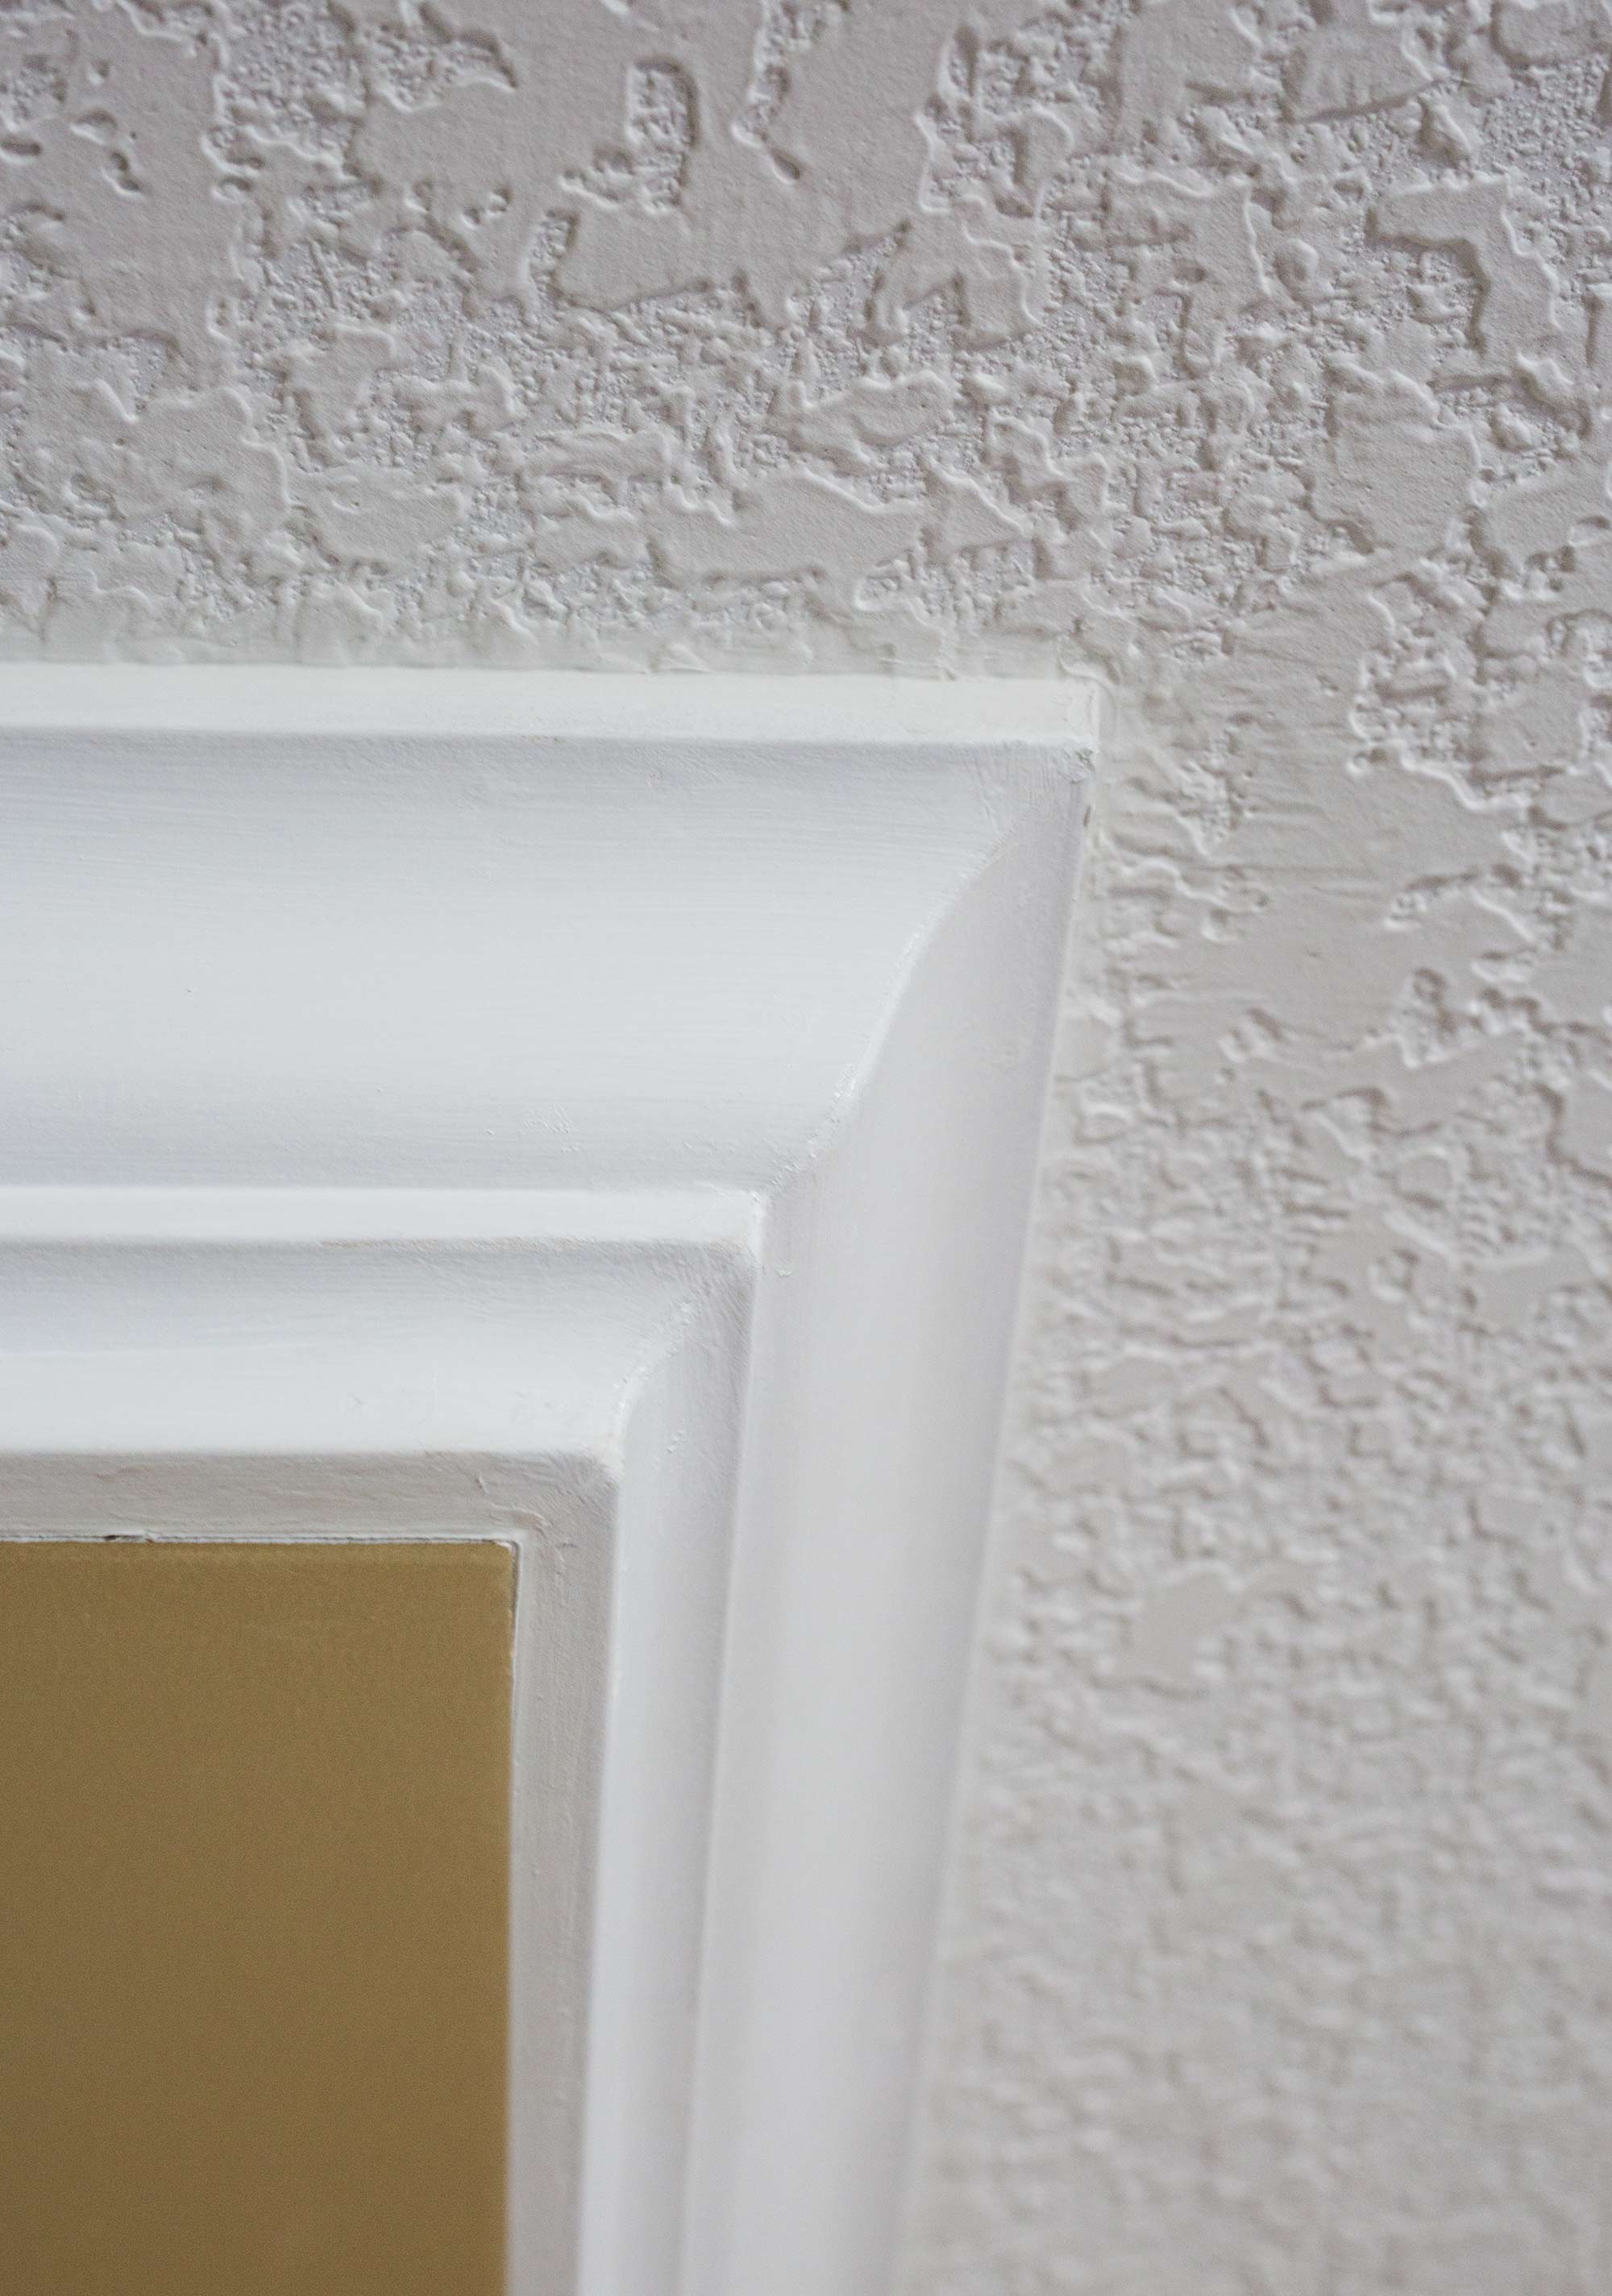
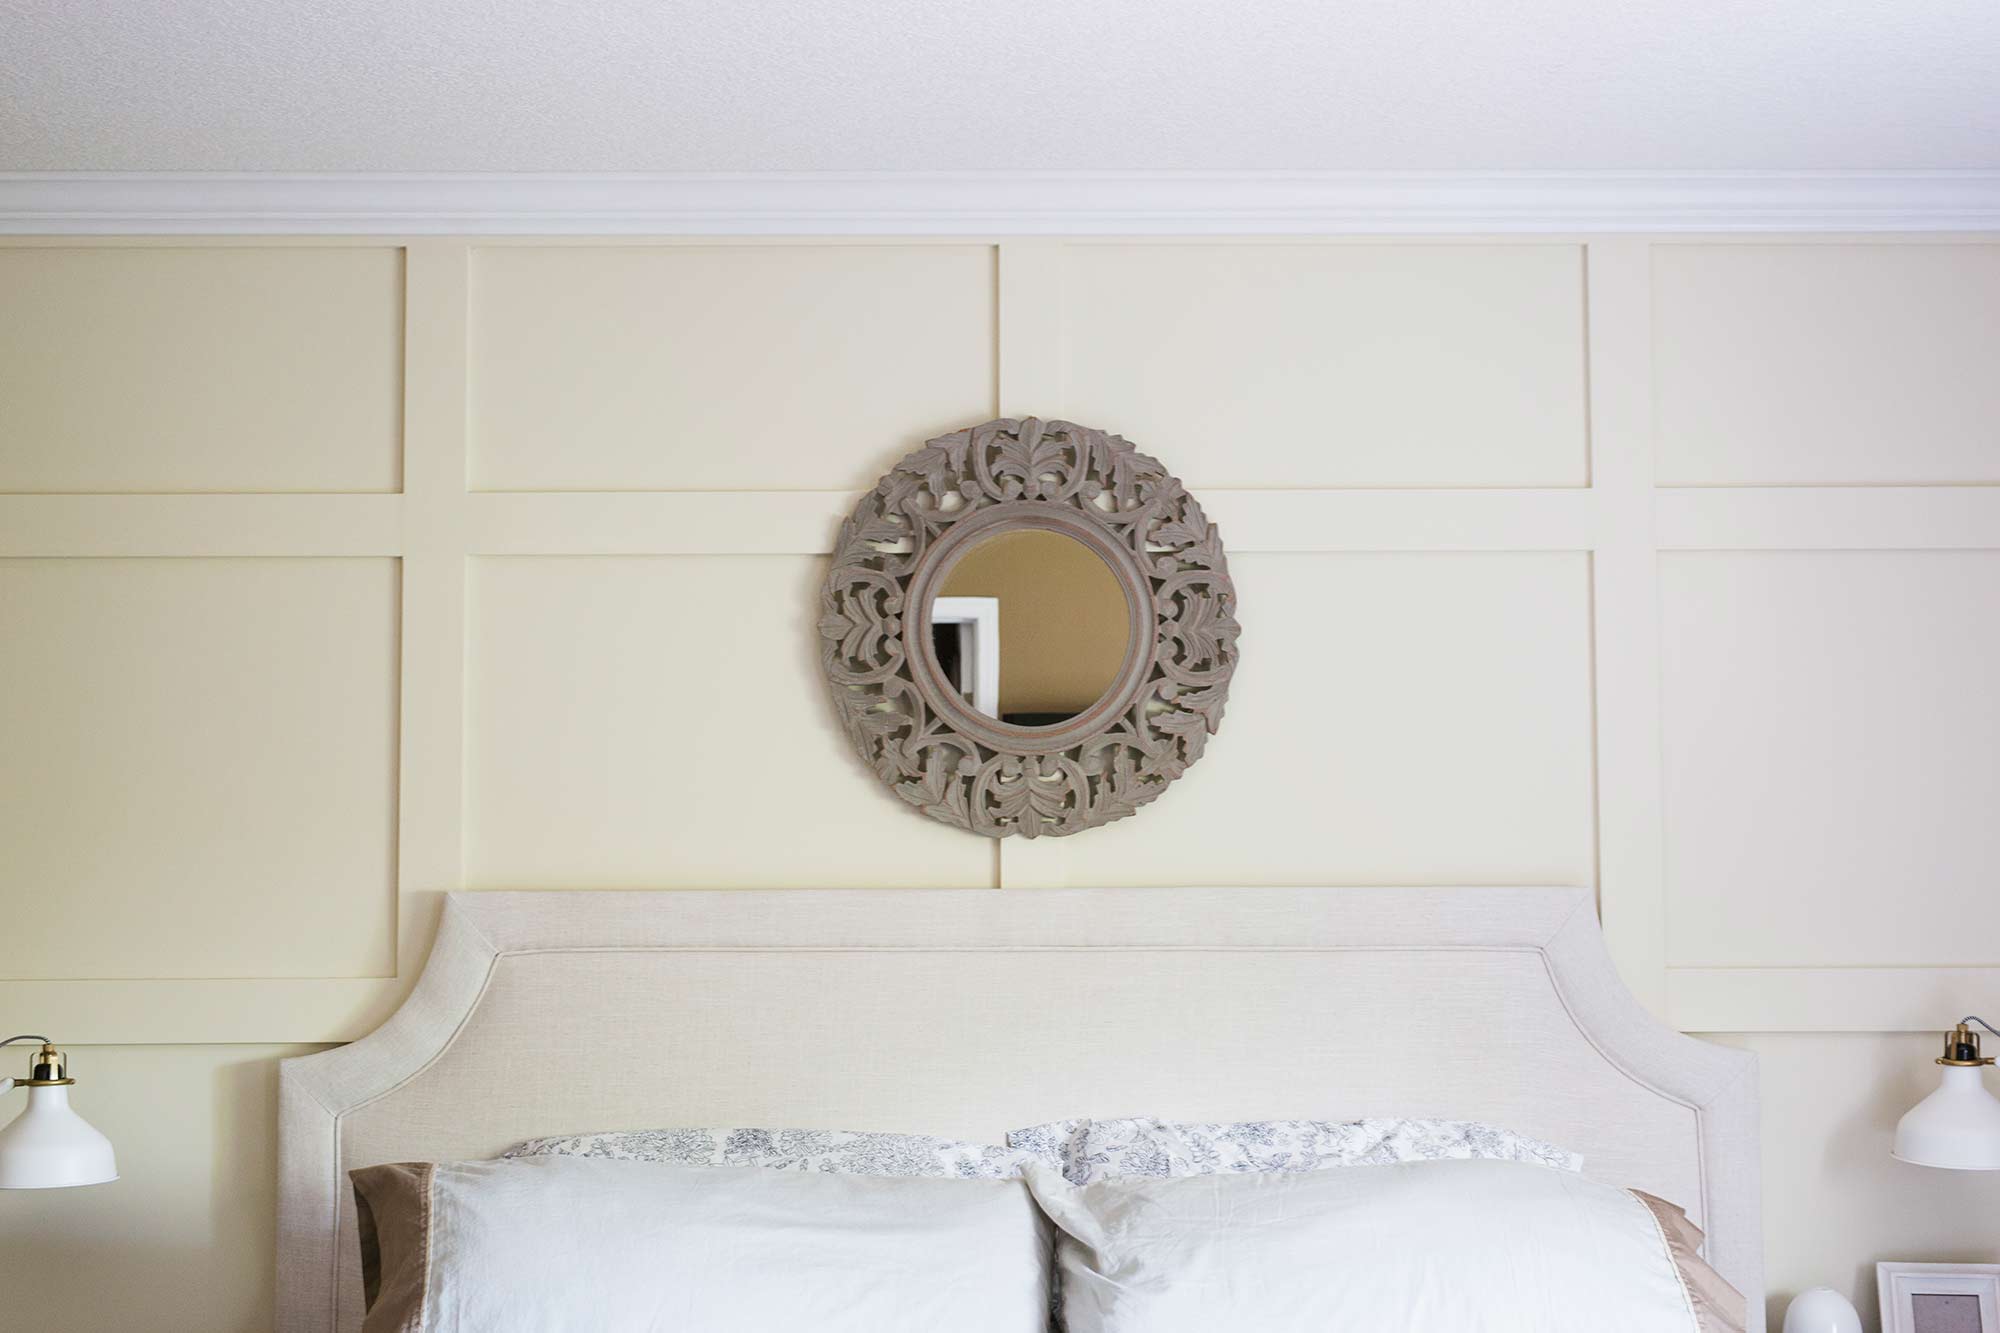
From start to finish I expect the install of the moulding took us about 2 hours…. and it’s 2 hours well spent if you ask me! I mean, look at the difference a little crown moulding can make! I might have to do the entire house now! 😉
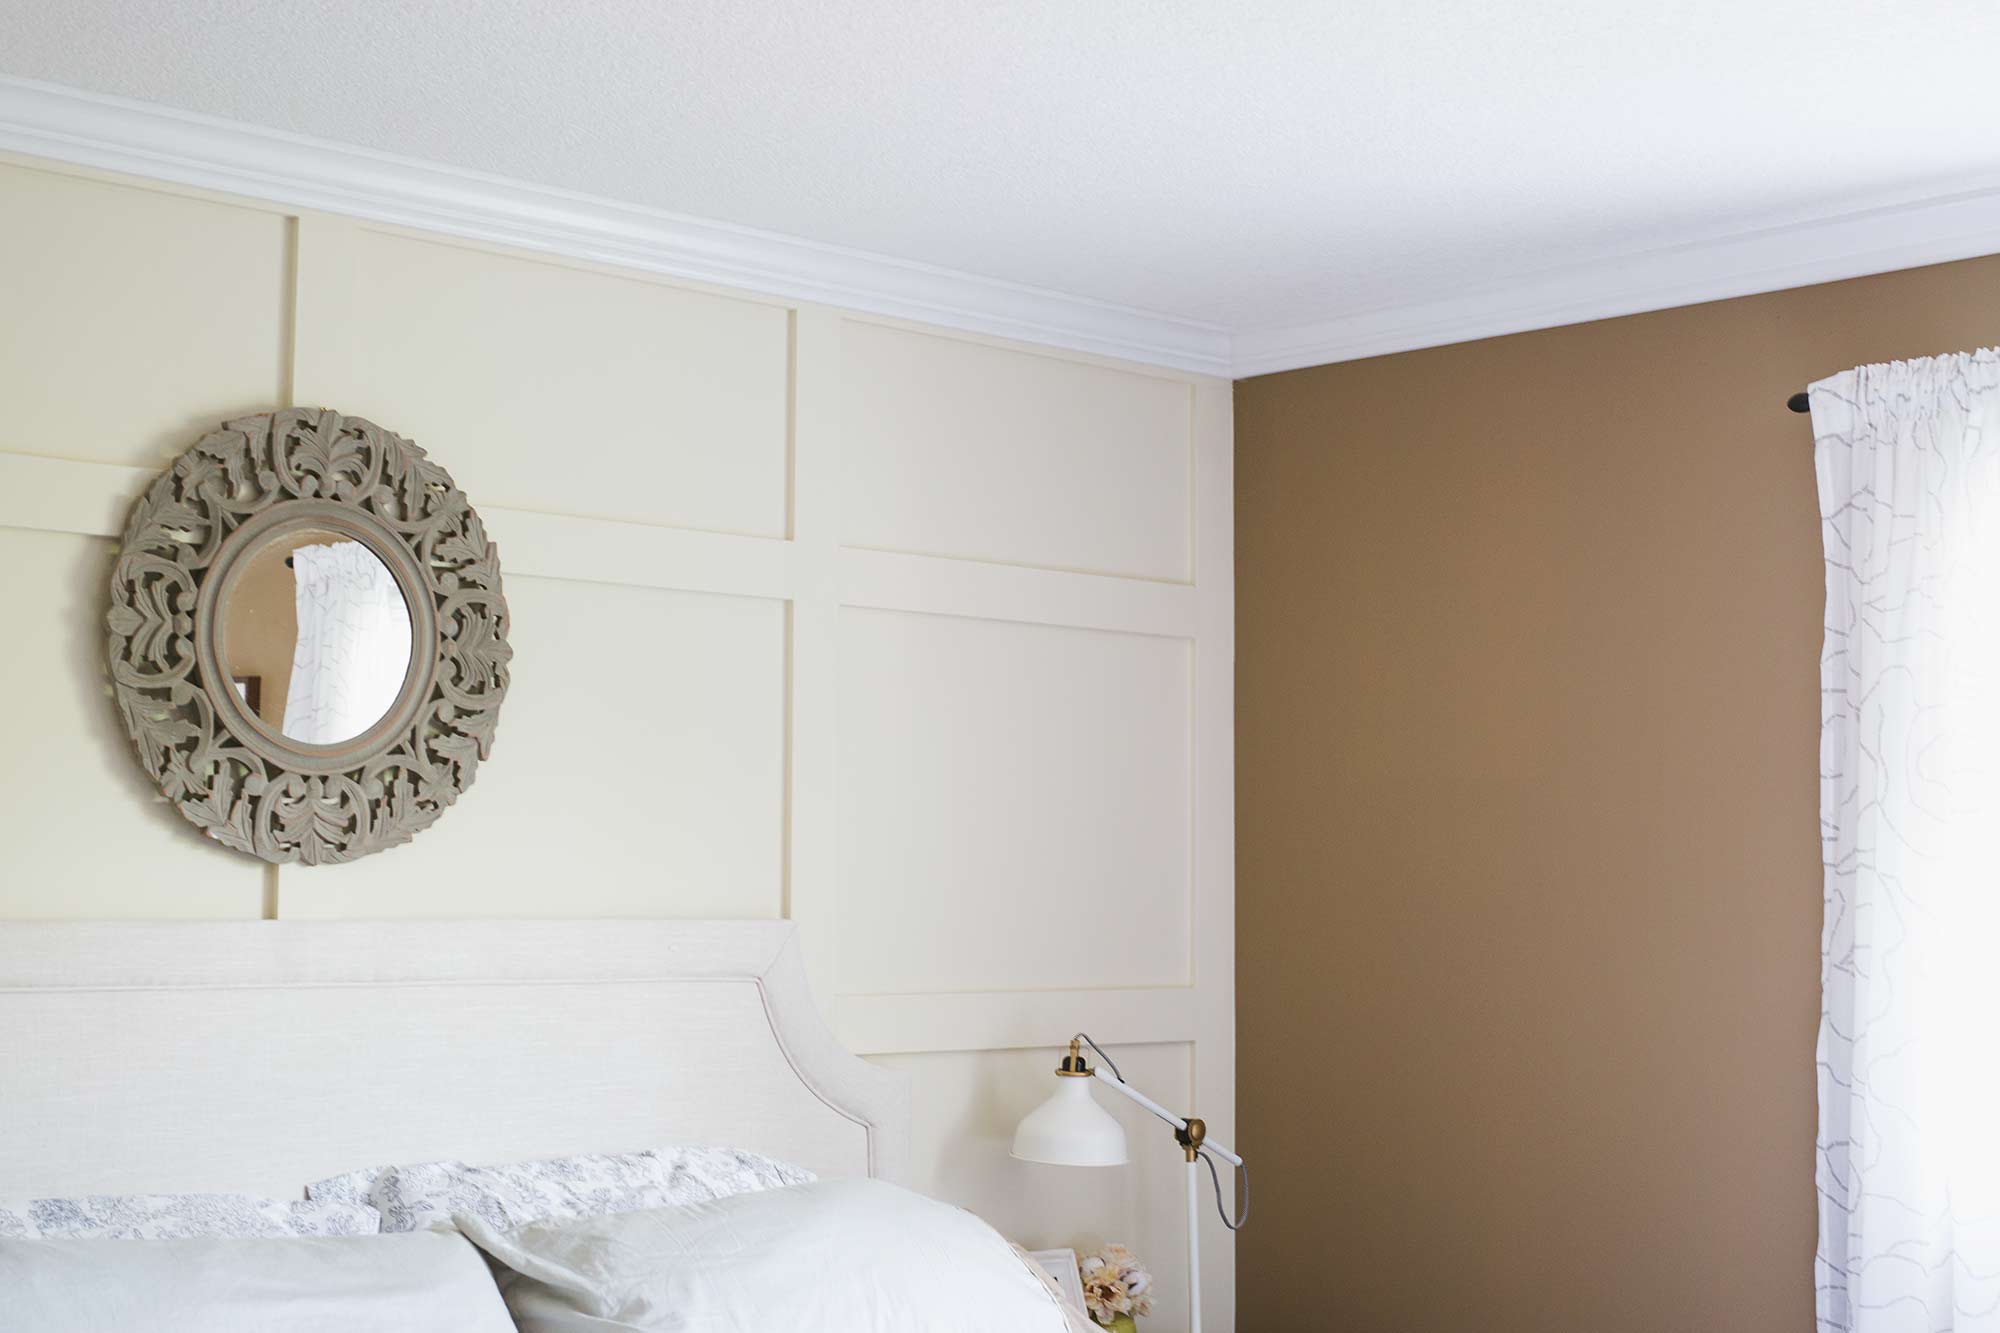
The best part of this project? I am now one step closer to finishing my master bedroom!
Do you have any tried, tested, and true methods for installing crown moulding?


Good job on the crown molding! 🙂 Where did you get your headboard?
Hi Shelli, thanks so much, we are really happy with how it turned out. The headboard is by Gluckstein Home, and it’s from The Bay.
Do you have a DIY post about the molding accent wall? GORGEOUS